Swedish Cinnamon Bread (Kanellängd) with Swedish Pearl Sugar

Sunday, December 16, 2018

2018_1215_Swedish-Bread-Pearl-Sugar-27
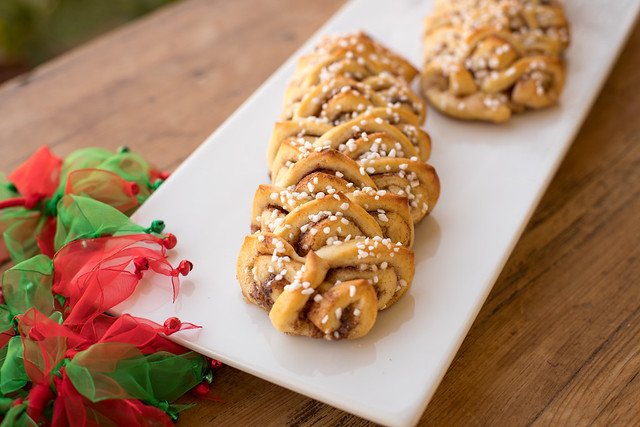
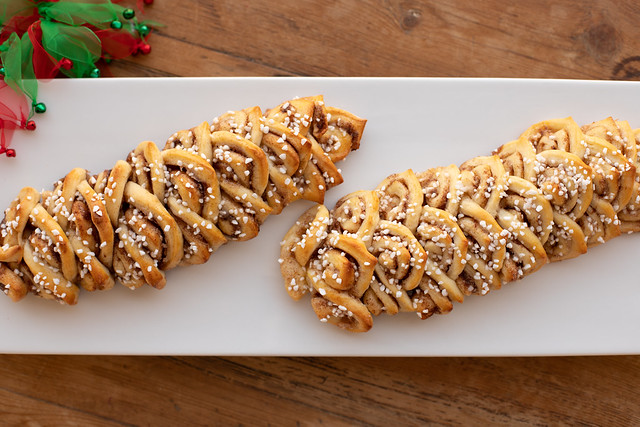
Kanellängd ~ Swedish Bread with Cinnamon and Pearl Sugar

Kanellängd or Swedish Bread topped with Swedish Pearl Sugar is one of my favorite treats of the holiday season. My friend Susan makes loaves of this delicious bread, and I always try to remain a permanent friend so I'm on the bread list. Ha ha. We've always wanted to get together to bake this super pretty bread, and 2018 was finally the year!

This recipe is really special - Susan's mother-in-law brought her recipe from Sweden when she immigrated to America. Susan's husband Rick remembers making bread every holiday season - this was before the ubiquitous Kitchen Aid mixer with dough hook so he remembers lots of mixing and kneading. I found recipes online and some have cinnamon and cardamom. But Rick's mom didn't like cardamom so that got nixed. I always love seeing how a traditional recipe is adapted by each family or generation.
2018_1215_Swedish-Bread-Pearl-Sugar-28
Aren't they sooooo pretty!?!? And they are just as delicious!!
2018_1215_Swedish-Bread-Pearl-Sugar-2
The recipe calls for a mix of Swedish and US measurements - isn't that a true immigrant recipe? Rick's mom had her own deciliter measuring cup (100 milliliters = 1 deciliter) that Susan & Rick continue to use to this day. Do you have inherited cooking tools that you treasure?

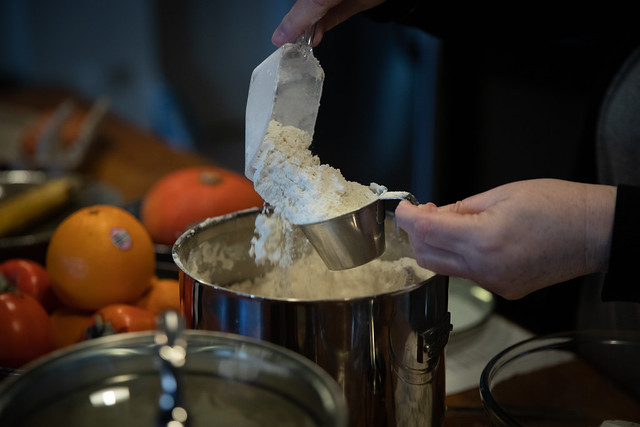
This dough is a sweet dough made with all-purpose flour, whole milk, butter, sugar, eggs, yeast, and a little salt.
2018_1215_Swedish-Bread-Pearl-Sugar-4
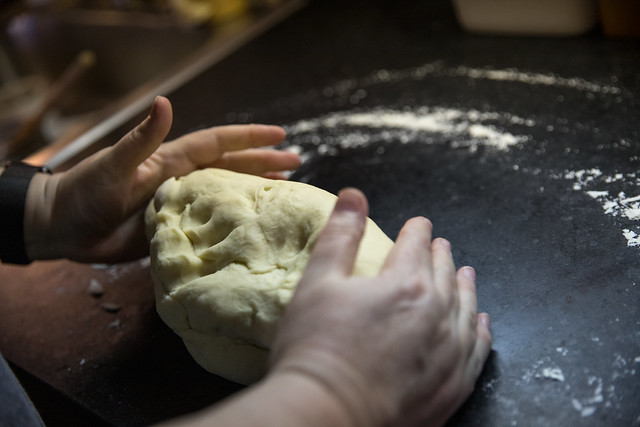
Dough! Kneading a bit before setting it aside to rise!
2018_1215_Swedish-Bread-Pearl-Sugar-10
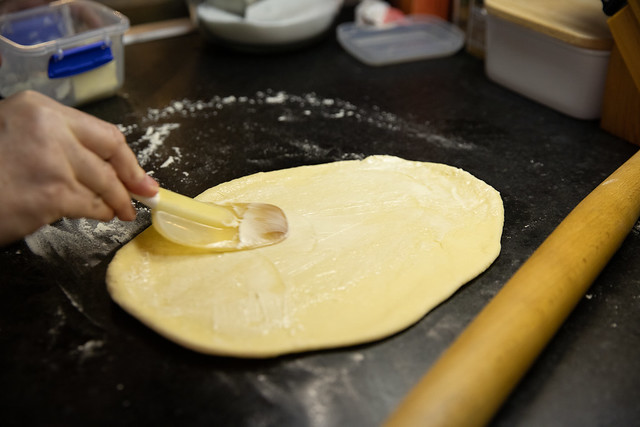
After an hour, the dough was punched down, kneaded, and divided into 8 equal pieces (using a scale is very handy). Then each piece is rolled out into a rectangle. Brush liberally with softened butter.
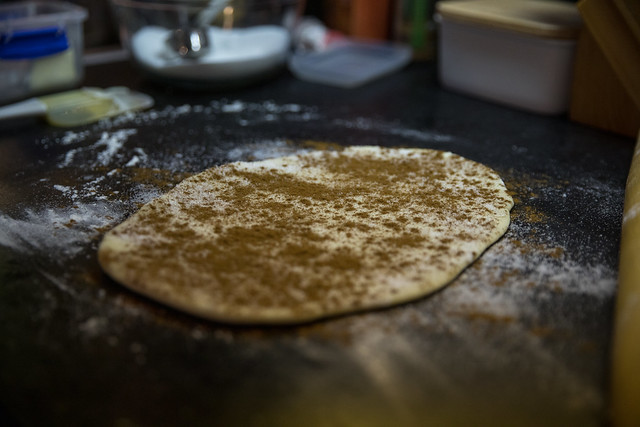
2018_1215_Swedish-Bread-Pearl-Sugar-11
Sprinkle with sugar and cinnamon.

2018_1215_Swedish-Bread-Pearl-Sugar-6
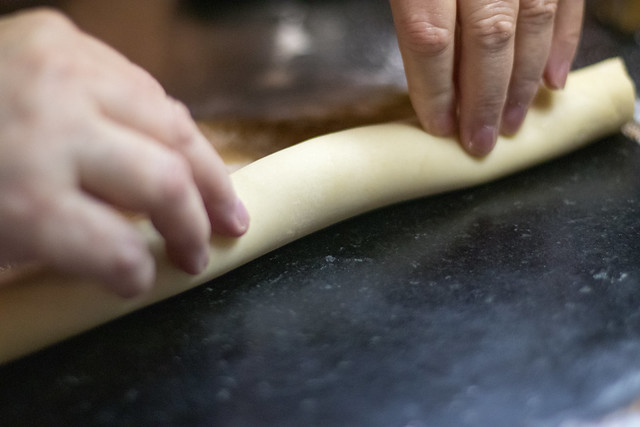
Roll the long end as tight as you can.
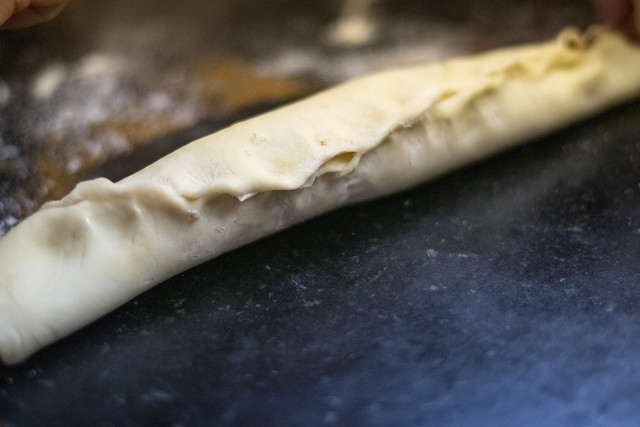
2018_1215_Swedish-Bread-Pearl-Sugar-7
Pinch seal as best you can. Place seam side down on the baking sheet.
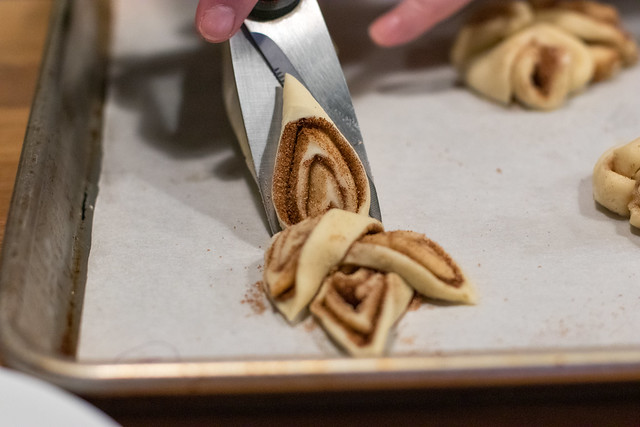
2018_1215_Swedish-Bread-Pearl-Sugar-8
Okay. Here's the fun part. Using kitchen shears, cut sections of the log. Cut as close to the bottom of the log as possible. Fold over the just cut section in the following pattern: Center, Right, Left or Center, Left, Right - just be consistent. It's a good idea to pinch the top of each leaf so it keeps a nice pointy top.
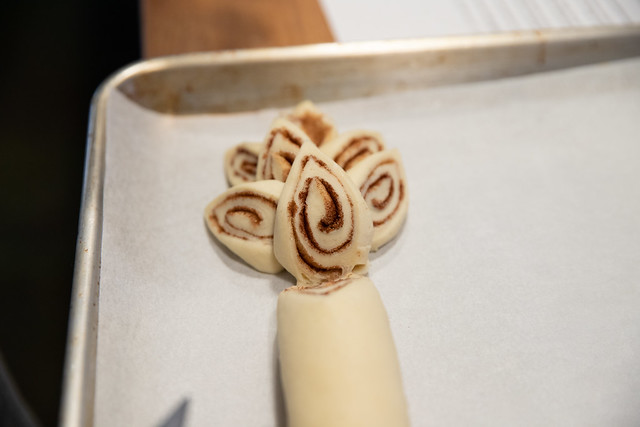
2018_1215_Swedish-Bread-Pearl-Sugar-12
Here's another view of the log. Center, Right, Left, Center, Right, Left...until you are done. You will need to nudge the uncut log up on the tray as you proceed to make sure you don't severe the bottom as the log stretches (this will make more sense when you are doing it).
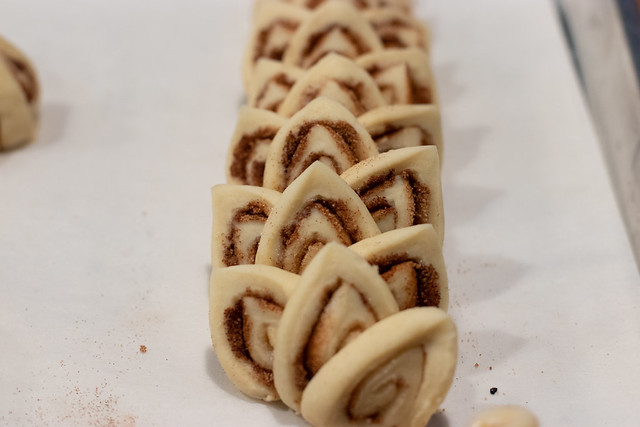
2018_1215_Swedish-Bread-Pearl-Sugar-13
By the way, when you get to the end, cut off any extra dough. Plop all those edges onto some part of the tray. Be sure to egg wash and Swedish pearl sugar those scraps and bake them off. Then you get to eat those scraps when they come out of the oven and save the loaf for your friends.

Cover the shaped loaves with a kitchen cloth and let rest for another hour to rise.

2018_1215_Swedish-Bread-Pearl-Sugar-17
After the second rise, preheat oven to 350 degrees F and get them ready to bake!
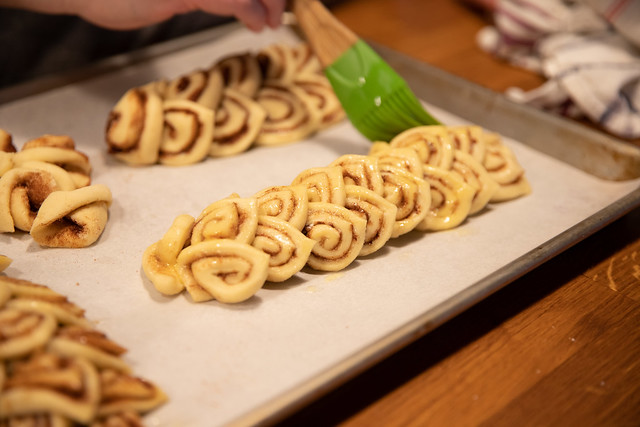
2018_1215_Swedish-Bread-Pearl-Sugar-19
 Brush each loaf with an egg wash. Be sure to get all the nooks and crannies. (Oh, in the upper left corner you can see the scrape pile of deliciousness). We fit three loaves on a half-sheet tray.
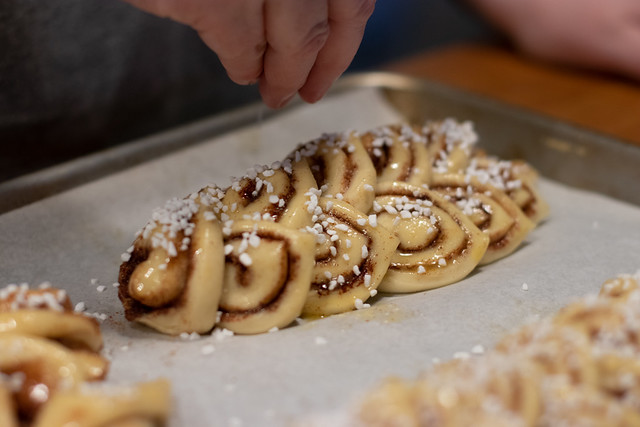
2018_1215_Swedish-Bread-Pearl-Sugar-18
Top each loaf with a generous amount of pearl sugar. (Try not to eat all the pearl sugar out of the bag like I tried to do...it's so tasty and fun). Bake for 15-20 minutes at 350 degrees (length depends on the size of your loaf). Our 8 loaves baked for 19 minutes.
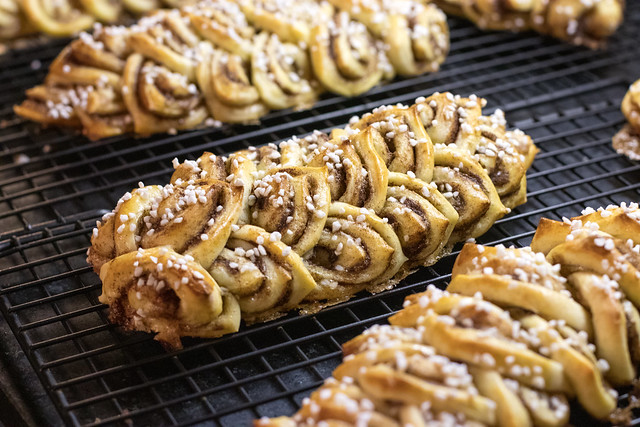
2018_1215_Swedish-Bread-Pearl-Sugar-22
Done! Yum! After 5 minutes, remove from tray and move onto cooling racks.


Kanellängd - Swedish Bread Recipe (via Rick's mom)

Bread dough:
5 dl (deciliter) whole milk = 2.11338 US cups
1 1/2 sticks butter (12 tablespoons)
2 dl sugar = .85 US cups
1 egg
1 tsp salt

2 packages active dry yeast
1 T granulated sugar
18-20 dl all-purpose flour = 7.6 to 8.45 US cups

Filling:
Softened butter (about a stick)
Sugar
Cinnamon

Topping:
Egg
Swedish pearl sugar (I purchased it at Surfas. Can be found on Amazon (affiliate link) or King Arthur)

Equipment needed:
Kitchen shears
Parchment paper
Baking sheets

Instructions:

Make the Bread Dough:
Heat milk, butter, sugar over low heat until butter is melted.

In a small bowl, lightly beat the egg. Temper the egg with a little of the milk mixture, then pour it into the milk mixture and mix well. Add salt. Set aside to cool a bit.

In another small bowl, combine yeast and 1 T of sugar. When the milk mixture is lukewarm, add 1/4 cup to bowl and whisk together. Set aside for yeast to start bubbling.

When the yeast is ready, start making the dough. In a stand mixer with the dough hook attachment, add 10 dl (about half the flour). Add the remaining milk mixture. Add the yeast mixture. Mix dough until combined and then add remaining flour, 1 dl at a time, until dough pulls away from the sides of bowl. Remove from bowl onto floured surface. Knead a few minutes then set aside in a bowl. Cover with clean kitchen towel and set in a warm area to rise for 1 hour.

After dough rises for an hour, punch down dough and knead about 50 times on a floured surface.

Divide dough to make loaves (we made 8 loaves so we used the scale to equally divide the dough.)

Shaping & Baking:
With a rolling pin, roll out dough into a rectangle on a floured surface. Spread softened button on the entire surface of the dough (we used about 1 T per loaf). Sprinkle sugar to cover the butter, then sprinkle cinnamon.

Roll the LONG side tightly and seal the edges by pinching the dough together. Place seam side down on a parchment lined baking sheet.

Using kitchen shears, cut the dough into 1/4" sections and shape (see photos above). Place cut sections in the pattern: Center, Left, Right, Center, Left, Right, and repeat.

Cover the loaves with a kitchen towel and place in warm area to rise another hour.

After an hour, preheat oven to 350 degrees F.

Brush loaves with a lightly beaten egg (no added water) and sprinkle with the delicious Swedish pearl sugar.

Bake at 350 degrees for 15-20 minutes. (Of course, it depends on how many loaves you make. When we made 8 loaves, they baked for 19 minutes.)

After 5 minutes, move loaves onto racks to cool. These are delicious warm from the oven. Can be kept at room temperature until you gift them to friends and family during the holiday season (or keep them for yourself to eat!) They are lovely warmed in the toaster over too. Enjoy!
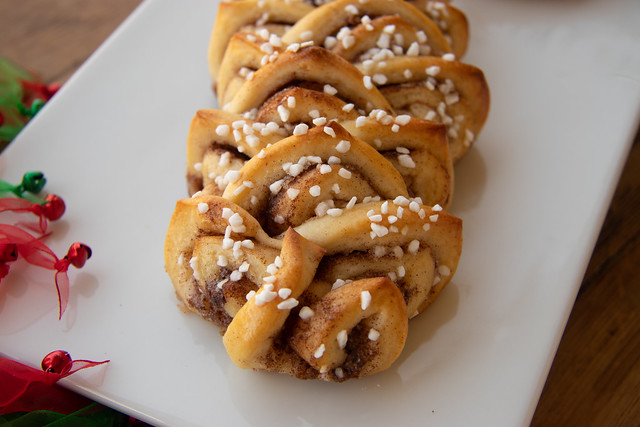
2018_1215_Swedish-Bread-Pearl-Sugar-24
I made this! 

Thanks Susan and Rick for years of friendship and for sharing this wonderful tradition with me!

Merry Christmas! ~ Mary the Food Librarian


Notes:
Savor The Flavour has a recipe that includes cardamom and a orange glaze. They have the segments go right or left (we have right, left, and center) and they make one big log.

BBC Food has a video (with really interesting music) and they make two cuts (left and right) and one big log.
Pin It!

Brownie Crinkle Cookies (The Boy Who Bakes recipe)

Friday, December 7, 2018

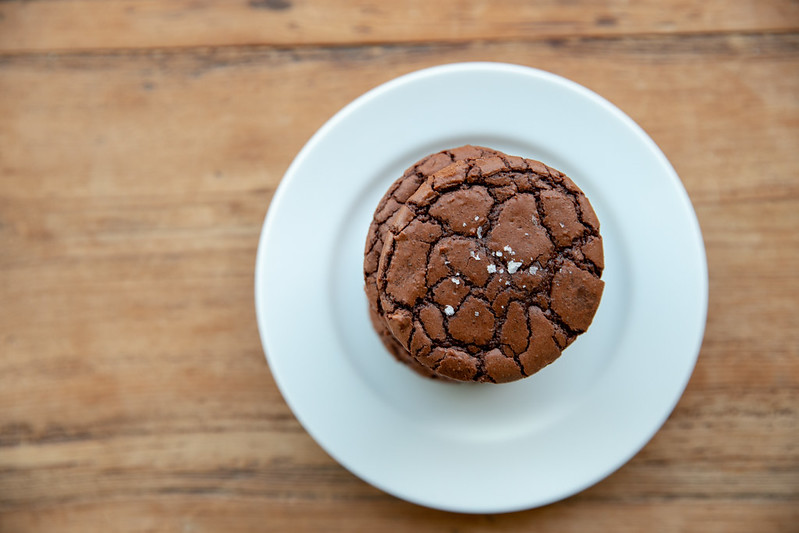
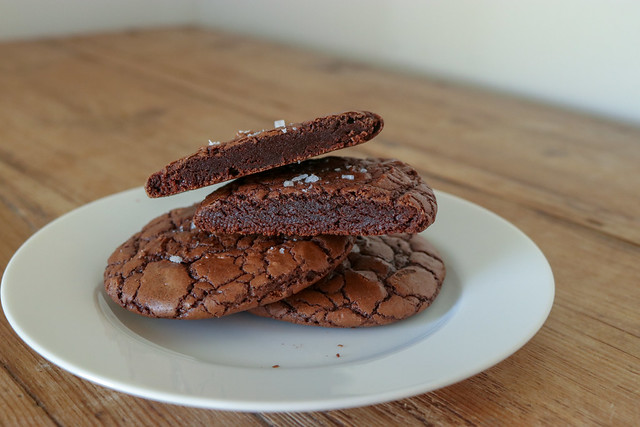
Brownie Crinkle Cookies on a plate

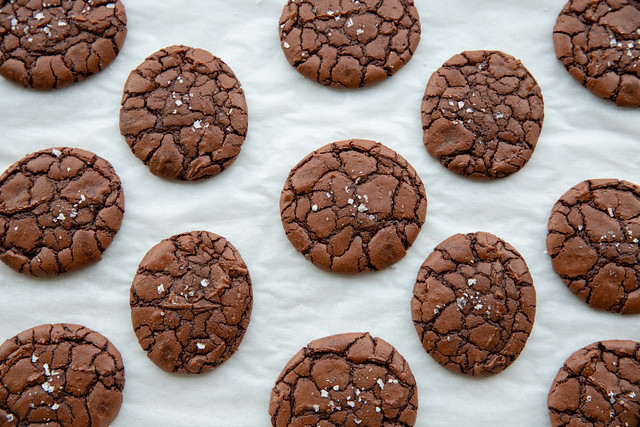
Brownie Crinkle Cookies from The Boy Who Bakes recipe

Do you have one hour? Then you have time to make these cookies! Really, they are super easy and fast. I can wake up super duper early and make them before work (and I leave home at 6 am). Sometimes, I don't have time to let them cool so I just lug the half-sheet pan into work. My co-workers don't mind. And I'm sure your friends won't mind too.

This recipe is from The Boy Who Bakes. I love Edd Kimber, cookbook author and winner of the BBC2's Great British Bake Off. He has engaging videos and fun content on Instagram. Earlier this year, he brought us heaven...in the form of a brownie cookie.

Baking these cookies is so much easier than baking brownies - you don't have to wait until the brownies are cool, cut them into squares, and place into cupcake liners. This is a brownie. In the shape of a drop cookie. Oh, did I mention there is sea salt? Yes there is.

I'm excited to come back to blogging with this recipe. I've been making these cookies All. The. Time. I would think colleagues would get sick of them...but apparently they have no trouble finishing them off. Let's go. - mary

Brownie Crinkle Cookies with Sea Salt | Food Librarian
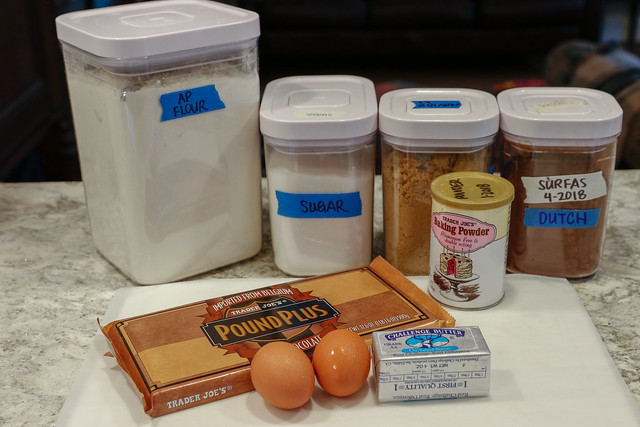
The Boy Who Bakes emphasizes this and I concur. You need GOOD ingredients for this to work. It has two types of chocolate: Dark chocolate and Dutch Cocoa. I use the Trader Joe's Belgium Dark Chocolate and Valhrona Dutch Cocoa (purchased at the new Surfas location in Los Angeles - so excited they are back!!)

The other thing that's key in this recipe is timing. You should mise en place your ingredients, preheat your oven, and have two parchment lined trays at the ready.

(The photos are from two different baking sessions in case they look slightly different.)

Brownie Crinkle Cookies with Sea Salt | Food LibrarianBrownie Crinkle Cookies with Sea Salt | Food Librarian
A few colleagues have said these are their favorite cookies and I should bring them to every meeting.

Brownie Crinkle Cookies with Sea Salt | Food Librarian
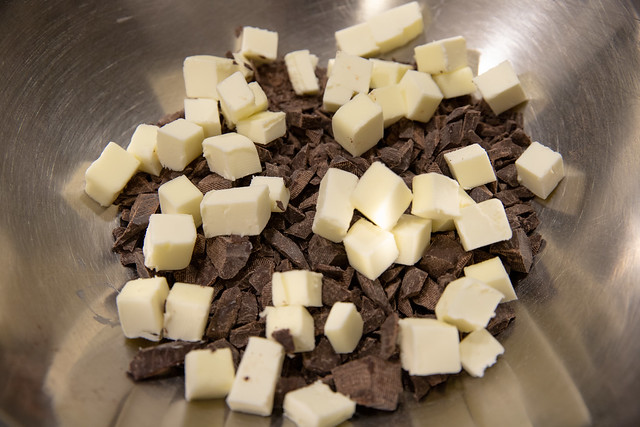
Process photos: Melt chopped chocolate and butter over double boiler.

Brownie Crinkle Cookies with Sea Salt | Food Librarian
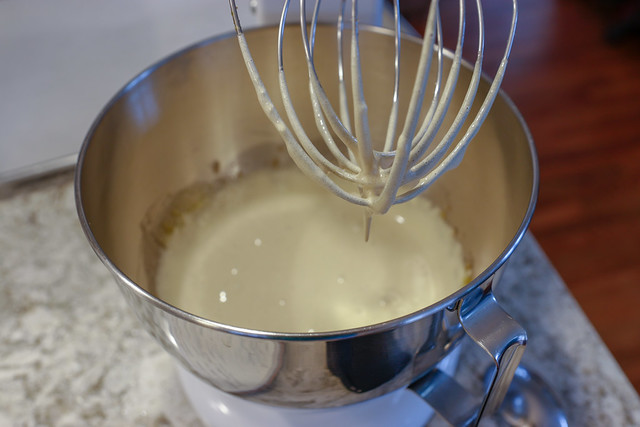
When the chocolate is melted, start the stand mixer containing the sugars and eggs. Beat for exactly 5 minutes.

Brownie Crinkle Cookies with Sea Salt | Food Librarian
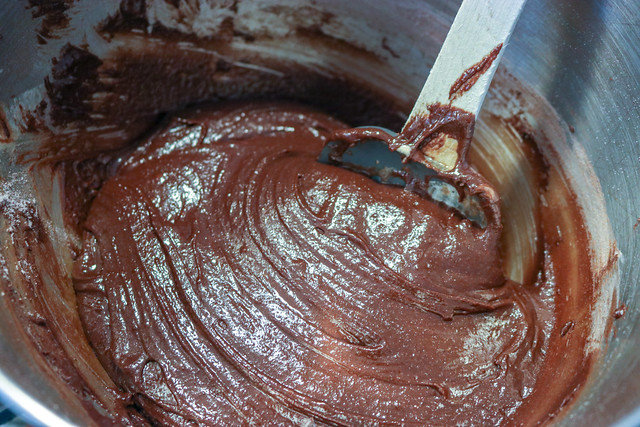
The final batter is thick and easily scooped into mounds.

Brownie Crinkle Cookies with Sea Salt | Food Librarian
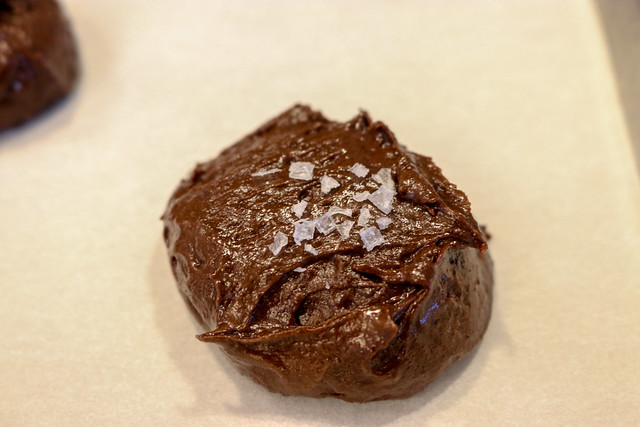
Top with flaked sea salt.

Brownie Crinkle Cookies with Sea Salt | Food Librarian
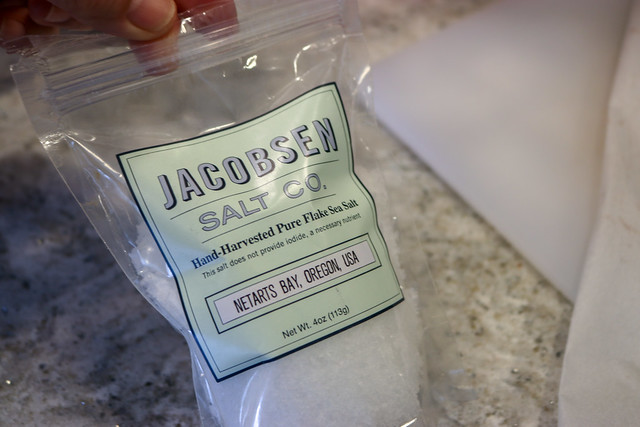
I use Jacobsen Salt Co. - Hand Harvested Pure Flake Sea Salt. It's really delicious salt. I even carry some around with me in a little tin - from Amazon (affiliate links)


Recipe: Brownie Crinkle Cookies
(adapted from The Boy Who Bakes)
200 g dark chocolate (around 65-70% cocoa solids), chopped - I use Trader Joe's Dark Chocolate pound bar
125 g (1 stick) unsalted butter, diced
150 g sugar (original recipe calls for caster sugar, but I use granulated sugar)
100 g light brown sugar
2 large eggs
130 g all-purpose flour
3 Tablespoon (about 18-20 grams) Dutch-processed cocoa powder (not natural) - I use Valhorna cocoa powder
1 tsp baking powder
1/4 tsp salt - I use kosher salt

Flaked sea salt for sprinkling - I used Jacobsen's

As the Boy Who Bakes stressed, timing is important. Be sure to have a preheated oven at 350 F ready to go, parchment lined sheet trays (I use 2 half-sheets), as well as all your ingredients scaled and ready.

1. Preheat oven to 350 degrees.
2a. Sift together dry ingredients (flour, cocoa, baking powder, and salt). Set aside.
2b. Using a double boiler, melt butter and chocolate, stirring occasionally. Remove from heat when melted.
3. As soon as the chocolate is melted, beat together the sugars (granulated and brown sugar) and eggs in a stand mixer with whisk attachment for 5 minutes (set a timer...you want 5 minutes).
4. Scrape down sides of mixture and add the melted chocolate & butter mixture. Beat for 30 seconds to 1 minute until combined.
5. Add the sifted dry ingredients all at once and mix just until combined. I usually stop early and finish folding with a spatula until blended. But hurry...you gotta get this into the oven.
6. Scoop with disher (cookie or ice cream scoop) so they are uniform in size. (Note: Boy Who Bakes makes them really big. He fits 6 on a tray and I get at least 12.) They do spread so don't crowd them on the tray.
7. Sprinkle some flaked sea salt on top of each cookie. (When I started I didn't put enough salt on each cookie, so don't be afraid).
8. Place in center of oven and bake for 12 minutes. They will develop a crinkled top and puff a bit. I bake with the tray in the center rack and only bake one tray at a time.
9. Remove from oven and let rest on the tray until they are cool. Because they are soft, don't move onto a cooling rack until they are cool.
10. Enjoy!

Link to original recipe:
http://www.theboywhobakes.co.uk/recipes/2018/3/29/j9cnerut0as1ec0fcdiawsc4usi7ss

Brownie Crinkle Cookies with Sea Salt | Food Librarian

Some products used and The Boy Who Bakes cookbooks (affiliate links to Amazon's program - if you buy something, I get a few cents to buy more ingredients, and it doesn't cost you anything)

        
Pin It!

Dorie's Cookies - Jammers with Jam and Dulce de Leche

Tuesday, November 29, 2016

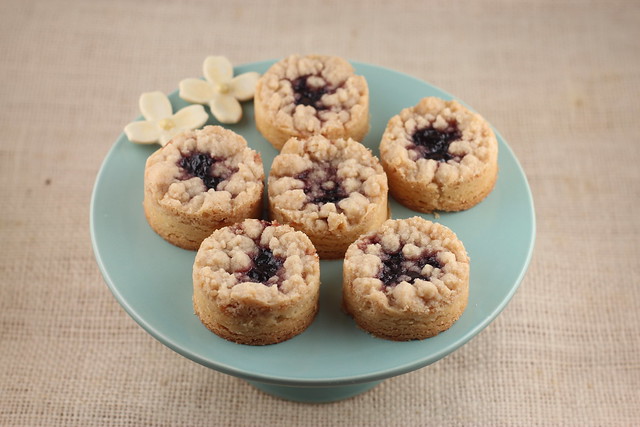
Dorie's Cookies - Jammers

Dorie's Cookies is out! 
Dorie's Cookies is out!

We can make Dorie's Cookies! Let's do this!

Dorie's cookies are so good and now she has a WHOLE cookbook dedicated to cookies! You have to get it. First of all, it's heavy. If you think this is just a flimsy cookbook of cookies, you are so wrong. It's Dorie! Of course she gives us all her best cookie recipes!!

I was fortunate enough to be gifted Jammers from her former cookie store Beurre and Sel. They were sooooo delicious. I knew what I had to make first!

2016-11-07_05-15-48
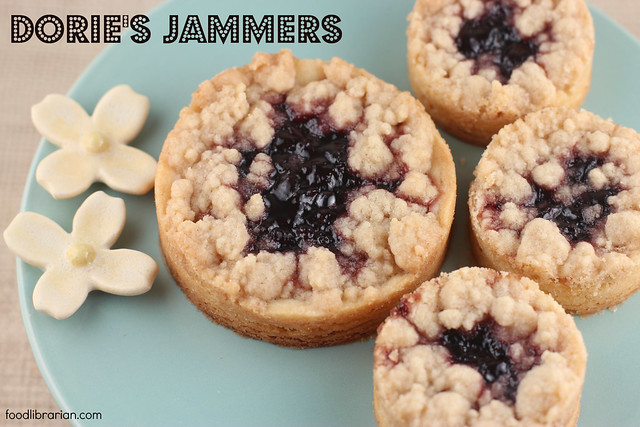
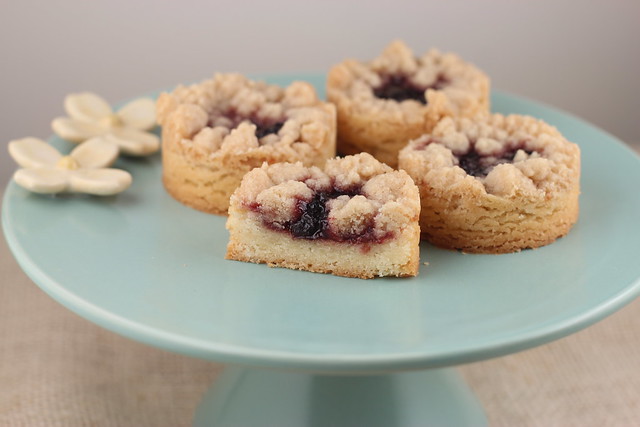
Jammers are shortbread dough, topped with jam and surrounded by a buttery streusel topping. Really, does it get any better?

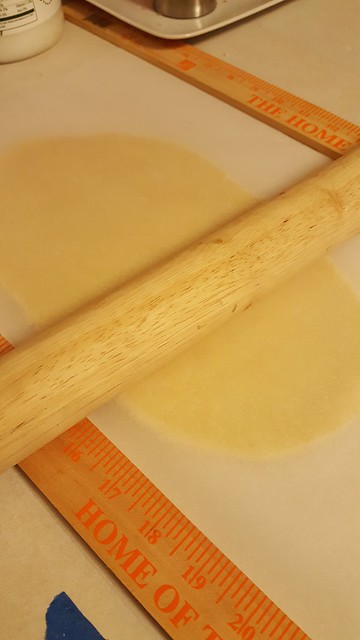
To get 1/4" dough, I roll the dough between parchment paper and use these yard sticks as guides. The guides are really a lifesaver as I'm not a good roller. I recently purchased these Rose Levy Beranbaum guides for thinner doughs (they come in 3/32" 1/8", and 1/16"). I haven't used them yet and am looking forward to giving them a spin.

Dorie's Cookies - Jammers
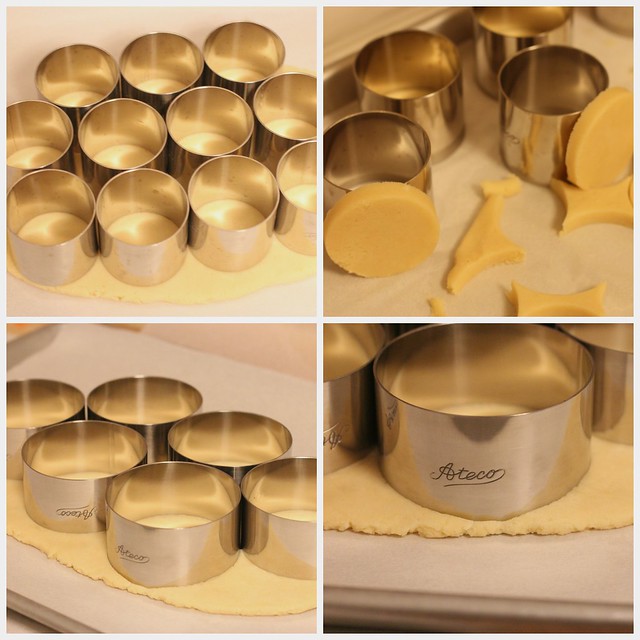
I used these Ateco 2" and 3" rings. Dorie's book explains how you can make them in a muffin tin too. Amazon sells them, but I bought a dozen each from Webstaurant Store online (Ateco 4901 3" Round and Ateco 4903 2" Round). They are super sturdy and will last a lifetime. [Update: I just bought a dozen more of the 2" rounds so I can bake 24 cookies at a time]

Dorie's Cookies - Jammers
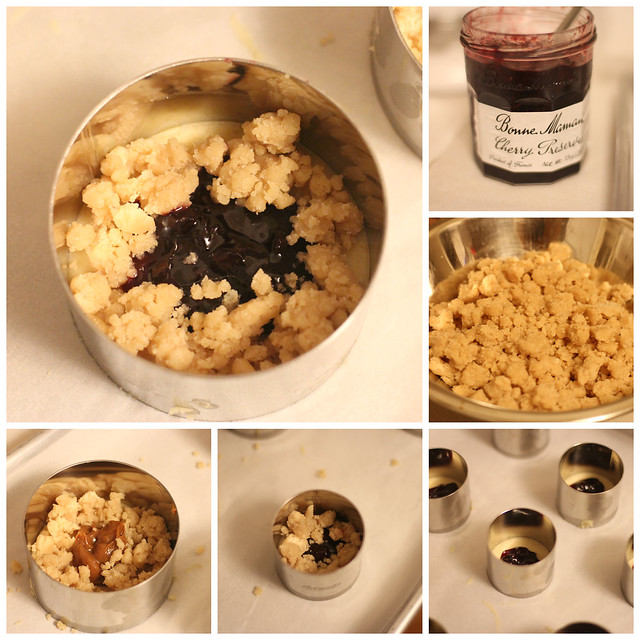
I used Cherry jam. I love Bonne Maman jam. The best! Dorie says you need a thick jam and their jam is super thick!

Jammers - Dorie's Cookies
These cookies are so buttery delicious. Seriously delicious. It's like the rich jam is sitting on a cloud of butter goodness and topped with streusel. I can't even.

Jammers - Dorie's Cookies
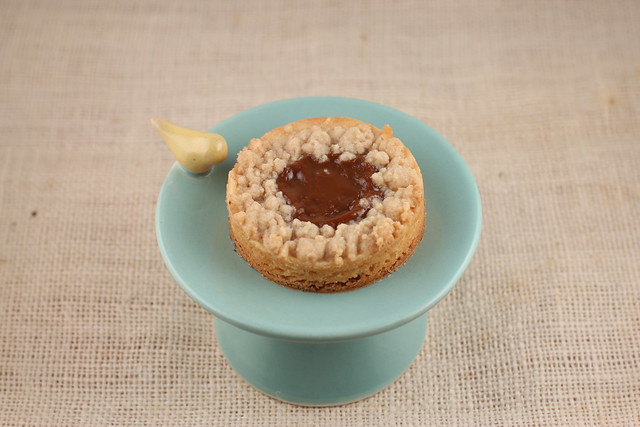
Filled with Dulce de Leche (Trader Joe's sells really good prepared Dulce de Leche in a glass bottle).

Jammers - Dorie's Cookies
I can't decide what I like better - the big or small ones. I like them both!

You can find the recipe in Dorie's Cookies. It's also on Epicurious, but you really need to get this book. Great holiday gift too! 

Can you believe it'll be December this week? I better get going on my Christmas cookies - of course, they'll come from Dorie's new book! ~ mary


Full disclosure: I'm in the Amazon Affiliate program and if you click on the links and buy something, I get a few cents - doesn't cost you anything. 
Pin It!

Blondies via the New York Times Cooking

Friday, November 4, 2016


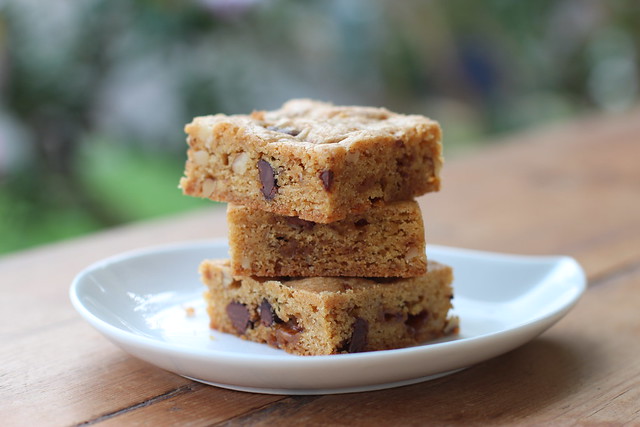
Blondies from NY Times
Blondies

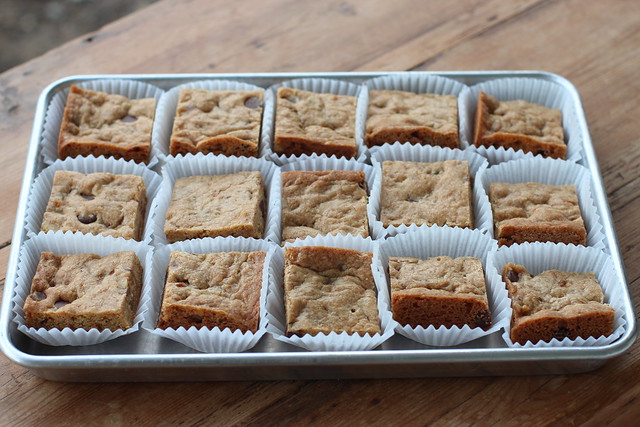
I can't believe it's already November! What what!? Here are some yummy blondies I made recently...to celebrate a fixed oven!

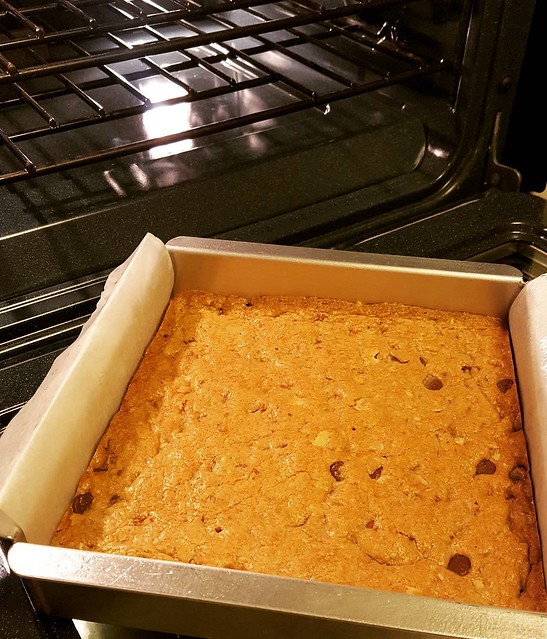
The oven is back!!!!!! Made these blondies from the NY Times Food Section...going to try them tomorrow morning. Yay! Heat! Oven! I've missed you!My oven died for a few weeks. The repair person cancelled an appointment, then that got rescheduled, only to find out that the problem was electrical. Then we had to ask around for an electrician and that person finally came out to fix the issue. But...YES! The oven is back! Sweet.

I just got the digital subscription to the New York Times. I already get the digital edition of the Los Angeles Times so more often than not, you'll find me reading the news my phone! I'm exploring more of the Food Section in the New York Times and this recipe looked great!

P.S. I've missed blogging. Things got busy in my life and motivation waned. I also post a lot to social media and don't want to write up a post. But as I type this and as I browse older posts, I love the diary format of the blog. It doesn't matter if one person to 100 people read it, it matters to me when I look back through the years. Trips taken, Meals consumed, Bundt cakes made. So, I hope to post more... they'll probably be quicker posts. My blog was never about capturing the best photo (man, there are tons of other blogs out there that are so much prettier) but it's about capturing me trying to bake from scratch and keep some memories. I hope I can write up some posts during my lunch hour or at least be a little more efficient. We'll see! Take care and see you soon! - mary the food librarian
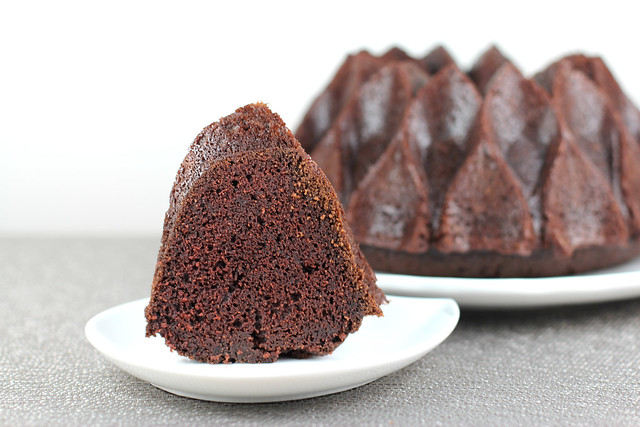

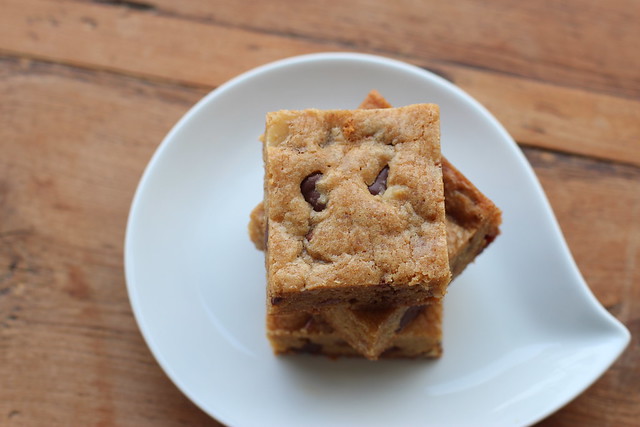
Blondies from NY Times
I really like Blondies because they are easy to cut and go. Sometimes scooping dough can take time so spreading it out in a pan makes life easy.

Blondies from NY Times
You need to bring this to a meeting a work. I guarantee your co-workers will love you.

Blondies
adapted from the New York Times

½ cup (1 stick) unsalted butter
½ cup granulated sugar
1 tablespoon molasses
1 ⅓ cups flour
¼ teaspoon baking powder
¼ teaspoon baking soda
¼ teaspoon salt
1 egg, lightly beaten
⅓ cup semi-sweet chocolate chips (recipes called for white chocolate chips but I don't really care for white chocolate, I used Nestle chocolate chips)
¼ cup Heath Bar Toffee Bits (recipe called for coarsely chopped Heath Bar)
½ cup walnuts, coarsely chopped (recipe called for pecans but I didn't have any so I used walnuts)

Instructions
1. Prepare a 8-inch square pan. I make a parchment sling, sprayed with baking spray, for easy removal.
2. Preheat the oven to 325 degrees.
3. Melt the butter (1/2 cup or 1 stick) in a saucepan. Remove from head and stir in the sugar and molasses, and transfer the mix to a large bowl to cool.
4. In another bowl, whisk together the flour, baking powder, baking soda and salt.
5. When butter mixture is cool, whisk in the egg until slightly fluffy.
6. Fold the flour mixture, then the chocolate chips, Heath bar and nuts.
7. Spread the batter into the pan with an offset spatula.
8. Bake until golden brown and a toothpick inserted into the middle comes out clean, 27 to 30 minutes.
9. Cool then cut into squares.
Pin It!

Fresh Peach Cake (Barefoot Contessa)

Thursday, August 4, 2016

Peach Cake
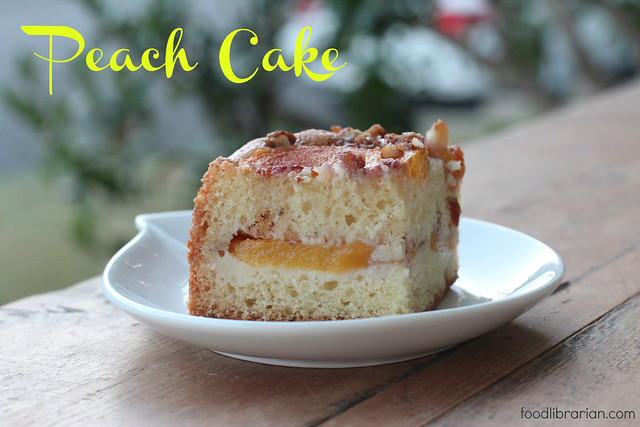
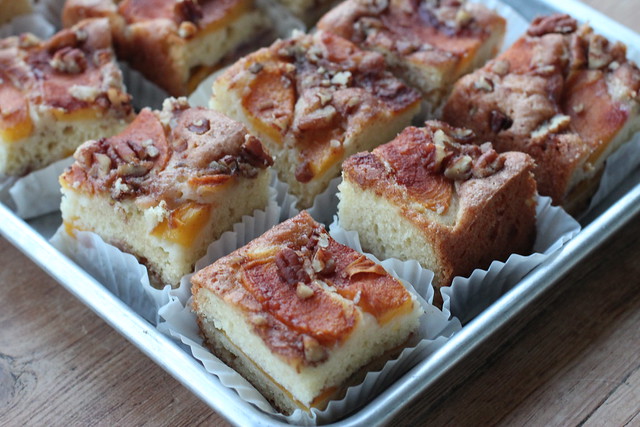
Fresh Peach Cake

Hello! I know, it's been forever since my last blog post. I've been working, eating, catching Pokemon, listening to the Hamilton soundtrack, and hanging out with my friends and family. I have been baking, but most of the stuff are repeats or greatest hits (brownies, bundts, and cookies).

I'm now on Snapchat...so if you want to take a look at the mundane covered in stickers (isn't that what Snapchat is about?!), then I'm @foodlibrarian on Snapchat.

So, onto this cake! It's summer and that means hella stone fruit. However, I missed my weekly Farmer's Market run and had to pick up peaches at the supermarket. Oh, the sadness. These peaches were so boring and lacking in flavor. I thought about adding them to a smoothie...and baking with them. I figure adding some sugar and spice would liven these up!

As I type up this post, I realize I made this cake with nectarines and almonds in 2011, but totally forgot about that post. It's 2016 and 2011 was a long time ago! :)

Peach Cake

On my Snapchat, I started at 4 am and took photos of the process. Making the batter, peeling peaches, layering the batter... and then I realize I'm using the wrong size pan. I had an 8" instead of 9" square. It was before 5 am and I had that wishful thinking moment of...let's bake it and just see what happens. Well, it was terrible because the center never cooked and the edges got dry. I was quite sad when I tossed that mess. (Remember, the difference between 8" and 9" square isn't just "an inch". 8x8=64" and 9x9=81" so that is 17" difference (yes, you should factor in the height, but for simplicity sake, I just want to say that using the right pan size is important!)).

But luckily (?), I had two more bad supermarket peaches and tried again after work! Here goes:

Peach Cake
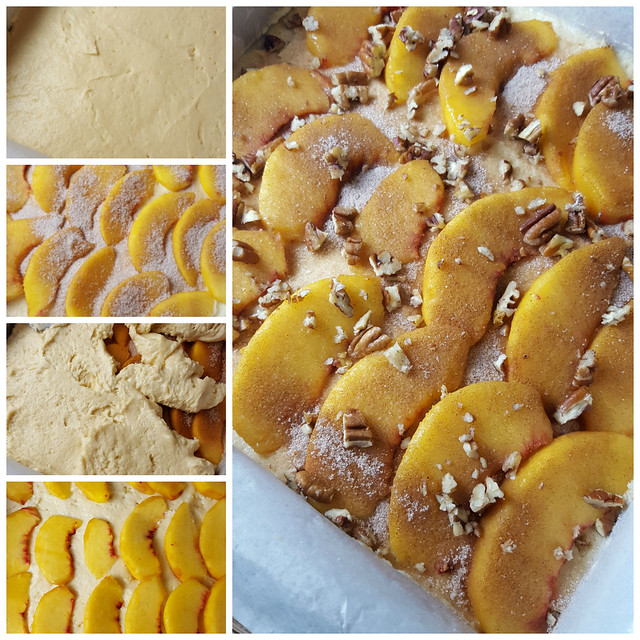
(Some of these photos are from the error 8" square pan, but you get the technique. Two layers of batter and peaches!)

Recipe:
Adapted from the Barefoot Contessa's Fresh Peach Cake

Peach Cake

1/4 pound (1 stick) unsalted butter, at room temperature
1 cup (200 grams) sugar
2 extra-large eggs, at room temperature (I used 2 large eggs from the fridge, put in warm water for 5 minutes before use)
1 cup sour cream, at room temperature
1 teaspoon pure vanilla extract
2 cups (280 grams) all-purpose flour
1 teaspoon baking soda
1 teaspoon baking powder
1/2 teaspoon kosher salt

2 large ripe peaches, peeled, pitted and sliced (her recipe calls for 3 large peaches but I used 2)

Topping:
1/2 cups (100 grams) sugar
1 teaspoon ground cinnamon

1/2 cup chopped pecans

Directions:
1. Preheat the oven to 350 degrees F. Grease a 9-inch-square baking pan. I created a parchment paper sling for easy removal.
2. In a bowl, sift together the flour, baking soda, baking powder and salt. Set aside.
3. In a small bowl, combine the 1/2 cup sugar and the cinnamon. This is the topping. Set aside.
4. In the bowl of the KitchenAid with the paddle attachment, cream the butter and sugar together until light and fluffy on medium speed (about 4 minutes). With the mixer on low, add the eggs, one at a time, then the sour cream and vanilla, and mix until the batter is smooth.
5. With the mixer on low, slowly add the dry ingredients to the batter and mix just until combined.
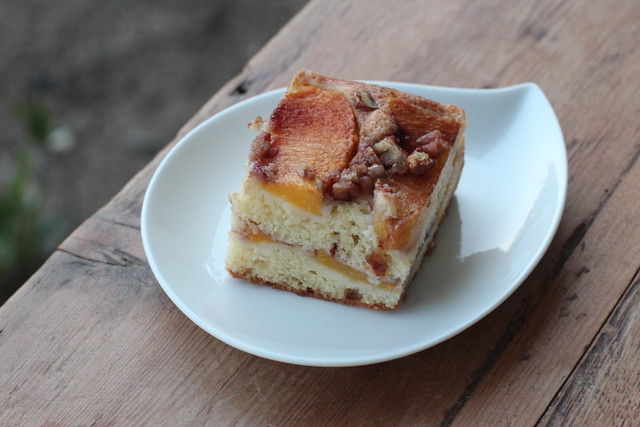
6. Spread half of the batter evenly in the pan. Top with half of the peaches, then sprinkle with two-thirds of the sugar mixture. Spread the remaining batter on top, arrange the remaining peaches on top and sprinkle with the remaining sugar mixture and the pecans.
7. The recipe says to bake the cake for 45 to 55 minutes, until a toothpick inserted in the center comes out clean. However, my cake took 60 minutes to bake (both times I made this cake, so don't be surprised if it take a little longer).


Pin It!

Meyer Lemon Curd Bars

Sunday, April 24, 2016

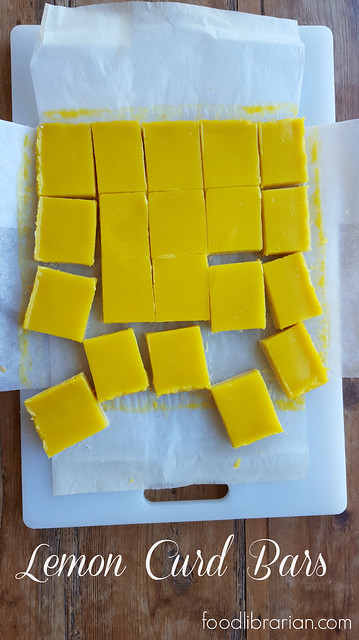
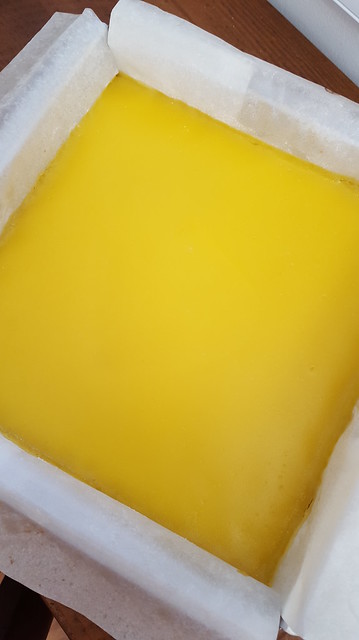
 Meyer Lemon Curd Bars
Meyer Lemon Curd Bars

Make These Lemon Bars.
Just do it.
There isn't much to say about it.
So, go. Make them!

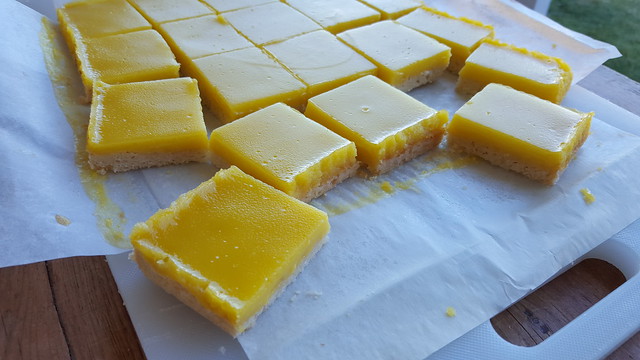
Meyer Lemon Curd Bars

Meyer Lemon Curd Bars
I like lemon bars made with cooked curd because the lemon flavor is just soooo much more intense. 

Meyer Lemon Curd Bars
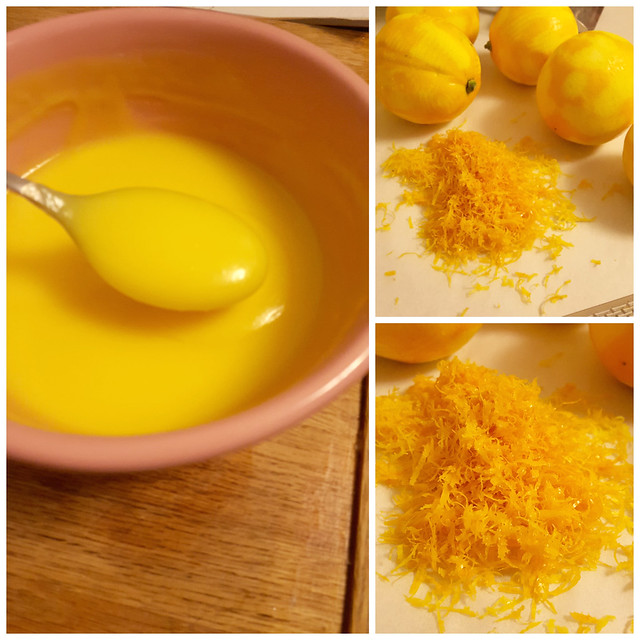
I used Meyer Lemons. Look at that color!!! I didn't sprinkle powdered sugar on top because...that color!

This is a Cook's Illustrated recipe - found on Leites Culinaria:  http://leitesculinaria.com/3357/recipes-lemon-bars.html

Meyer Lemon Curd Bars
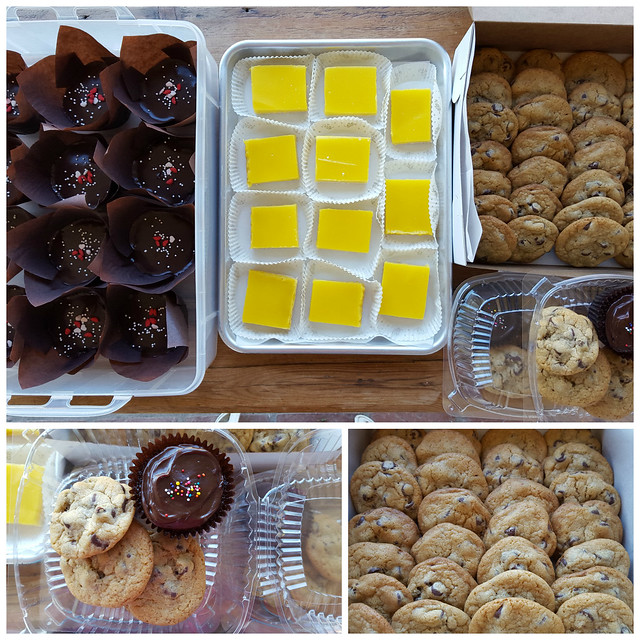
I made these as part of a gift package I brought to one of our libraries. It's a small library... hope this was enough for the eight person staff! I made some to go boxes too...because it's good to share. :)

What are you doing still reading this post?! Get the recipe, grab lots of lemon and eggs, and make it! :)

Pin It!

Chocolate Espresso Bundt Cake

Thursday, March 31, 2016

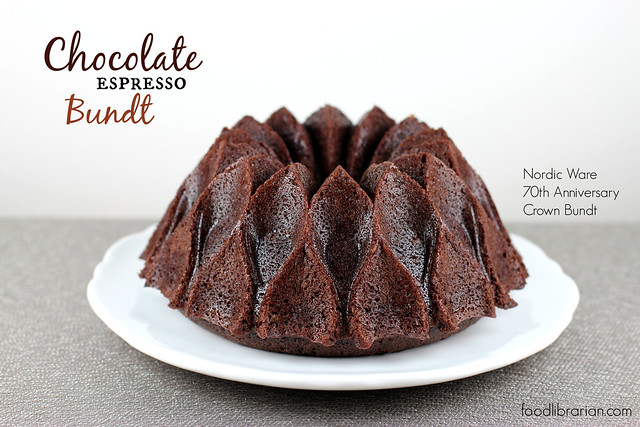
Chocolate Espresso Bundt Cake in Nordic Ware Crown Bundt Pan

Chocolate Espresso Bundt Cake

Chocolate + Espresso + Amazing Crown Bundt Pan = Simply Delicious!

You know that "Japanese Clutter" book (The Life-Changing Magic of Tidying Up: The Japanese Art of Decluttering and Organizing by Marie Kondo)? Well, she tells you to hold up every single item you own and ask, "Does this bring me joy?" If not, you toss it without regret because you only want to surround yourself with things that make you happy.

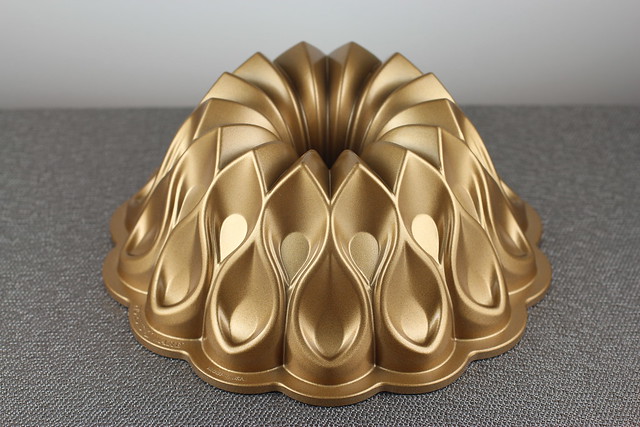
Therefore, I just want to tell you... I want to surround myself with this new Nordic Ware Bundt pan (and its cousins, all my other Bundt pans). This Crown Bundt is the diva of my Bundt world - totally cool and layered in gold.

(As an aside, I found the book interesting although sometimes crazy, but she has revolutionized my drawers so I now "stand up my folded clothes" and it saves so much space. Really.)

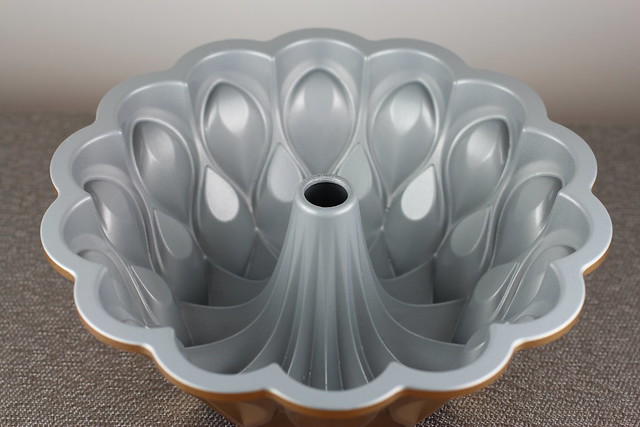
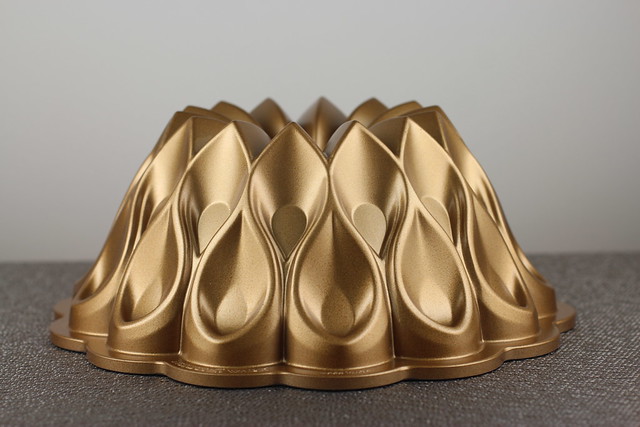
I'm excited to show you the new 70th Anniversary Nordic Ware Crown Bundt pan. Isn't it pretty? It's amazing that family-owned Nordic Ware has been making bakeware for 70 years! Most of their pans are made in America too.

As I've said for years on this blog, the best Bundt pans are made by Nordic Ware. And as you've seen over the years, I only have Nordic Ware in my kitchen!


Chocolate Espresso Bundt Cake in Nordic Ware Crown Bundt Pan

Chocolate Espresso Bundt Cake in Nordic Ware Crown Bundt Pan
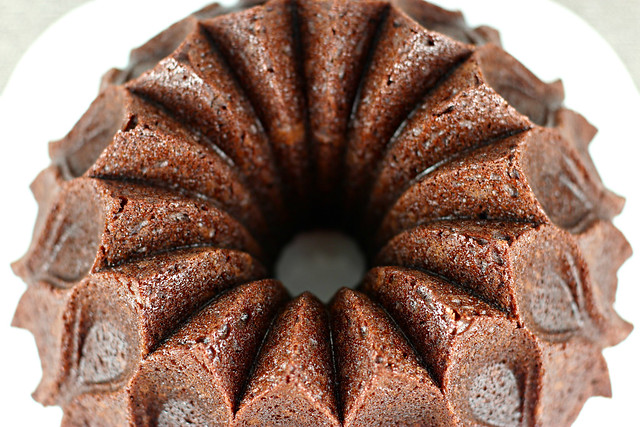
Inside the Nordic Ware Crown BundtI really appreciate Nordic Ware's crisp lines in all their pans. The humps in the traditional bundts are well-defined and the designs really hold in the finished cake.

Chocolate Espresso Bundt Cake in Nordic Ware Crown Bundt Pan
This design was made specifically for the 70th Anniversary Celebration and honor Nordic Ware’s Scandinavian roots. It's a great 10 cup Bundt pan to add to your collection. And look at it!!! It's gold! For the first time ever, it has a limited edition sparkling gold-metallic finish. They have two other Bundts in the collection that have gold finishes too.

Hey, it's an Olympic year, so you deserve a Gold Bundt in your collection.


Chocolate Espresso Bundt Cake in Nordic Ware Crown Bundt Pan
Here's a side view of the cake. This was a big hit at work. It's a perfect Bundt for a meeting or brunch - goes nicely with coffee or tea.

Chocolate Espresso Bundt Cake in Nordic Ware Crown Bundt Pan
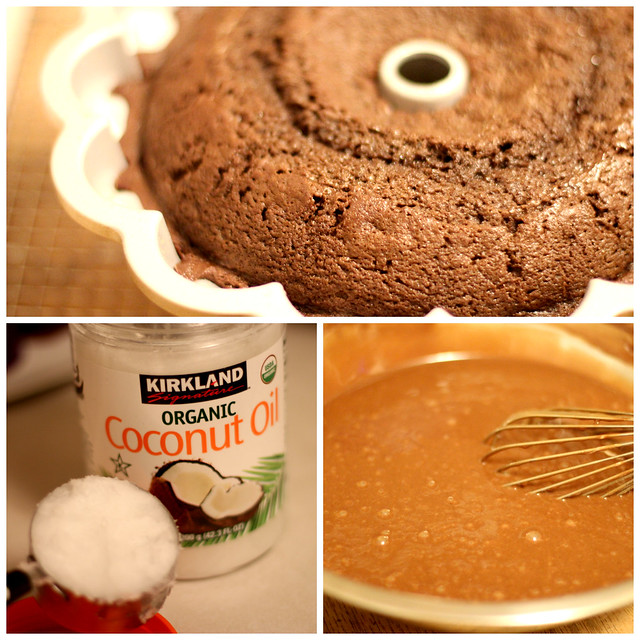
For this recipe, I was inspired by my favorite Chocolate Cinnamon Bundt, but switched up the flavors. I added some instant espresso powder to highlight the chocolate flavor, and used butter and coconut oil. It's super easy to make - you just need to melt some ingredients and mix. No KitchenAid mixer is needed.

Chocolate Espresso Bundt Cake in Nordic Ware Crown Bundt Pan
If this new Crown Bundt pan doesn't spark joy in your life, then you are doing it wrong :)
Get the pan from Nordic Ware!

Disclosures: The nice folks at Nordic Ware gifted me the Crown Bundt product. Opinions are my own. Also, I'm in the Amazon Affiliate program and make a few cents if you click on some product links. 

Recipe: Chocolate Espresso Bundt Cake

1 stick (1/2 cup) unsalted butter
1/2 cup coconut oil (it was solid when I measured it)
5 T cocoa powder (I use 30 grams of Hershey's cocoa)
1 cup water (it goes faster if you use hot water)

2 cups (280 grams) all-purpose flour
1 3/4 cups (350 grams) granulated sugar
1 teaspoon kosher salt
1 1/2 teaspoons baking soda

2 large eggs, lightly beaten
1 teaspoon pure vanilla extract

1/2 cup sour cream

Instructions:
Prepare 10-cup or 12-cup Bundt pan (I prefer to use a baking spray (with flour) but you can also butter and flour the pan). Preheat oven to 350 degrees.

1. In a large bowl, whisk together: flour, sugar, baking soda, and salt.
2. Place water, coconut oil, butter, instant espresso powder and cocoa in a small pot and heat until melted, whisking to combine together. Remove from heat.
3. Add the chocolate mixture to the flour mixture, and whisk by hand until combined.
4. In a small bowl, lightly beat together the eggs and vanilla. Add to the batter and combine.
5. Add the sour cream and combine with the whisk.
6. Pour batter into prepared Bundt pan. It will be a runny batter.
7. Bake at 350 degrees for 40-50 minutes (depending on your oven and pan), until a wooden skewer comes out clean.
8. Remove from oven and let sit on a wire rack for 15 minutes. Invert onto wire rack and let cool completely.
9. Eat plain or dust with powdered sugar and enjoy.
Pin It!

Honey Pineapple Ginger Granola

Friday, March 25, 2016

Honey Pineapple Ginger Granola

I love granola! It's perfect on yogurt, cottage cheese or with some milk. I love the combo of toasted oats, nuts and dried fruit. I don't make it enough...but that'll change because I really like this recipe for Honey Pineapple Ginger Granola! It's simple, fast, and tasty!

Honey Pineapple Ginger Granola
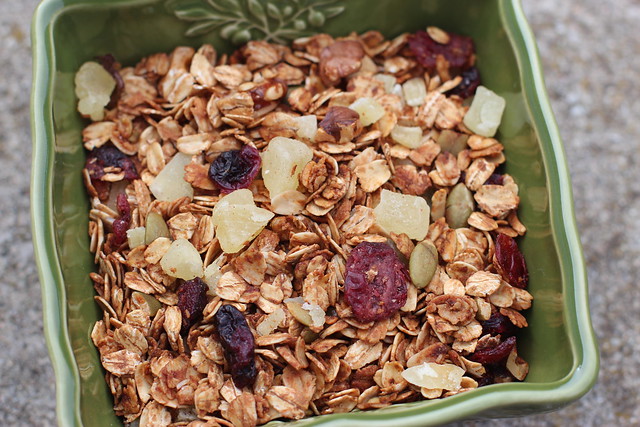
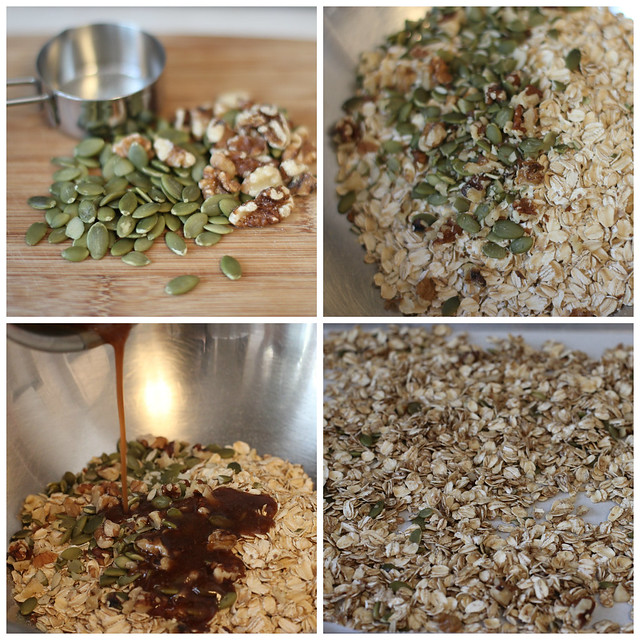
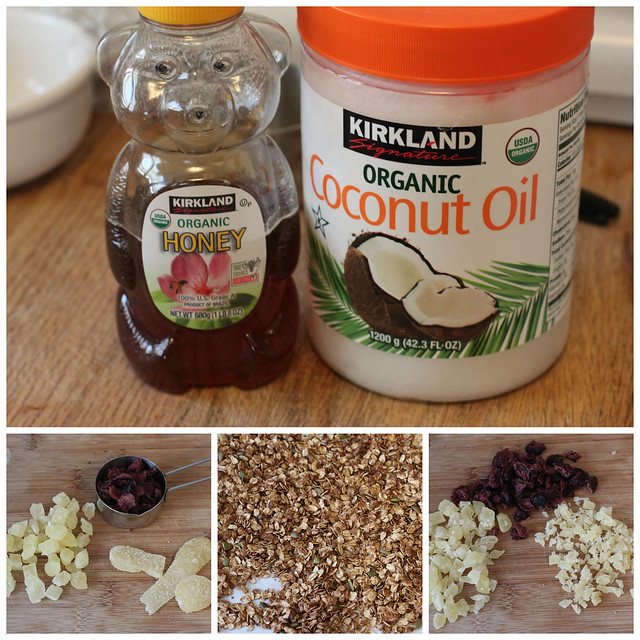
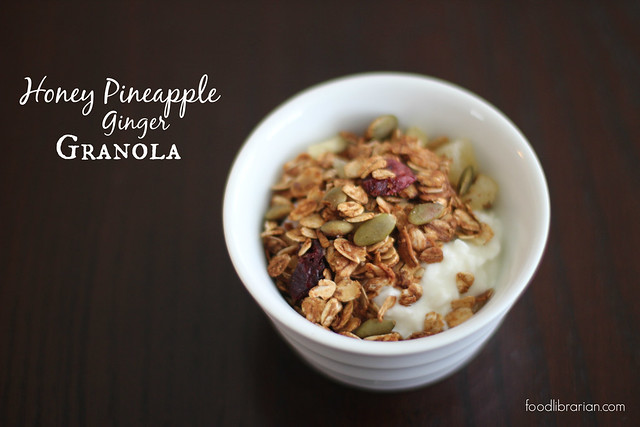
This granola is filled with sweet, spicy and all things in between! It has old fashioned oats, Dried Pineapple, Crystallized Ginger, Dried Cranberries, Pepita Seeds, Walnuts, and Ground Cinnamon, Ground Ginger, and Nutmeg. The secret sauce is a combo of honey and coconut oil.

Honey Pineapple Ginger Granola
This recipe is inspired by "Honey and Hazelnut Granola" that Valerie Bertinelli made on her Food Network show. She used hazelnuts and dried apricots. Also, her batch was larger (I halved the basic ingredients).

I used walnuts and pepitas seeds, along with 2 cups of old fashioned oatmeal. I never have quick-cooking oats that were called for in the original recipe, but everything turned out fine with the old fashioned oatmeal.

Honey Pineapple Ginger Granola
The nice folks at Costco sent over some products to try including Kirkland Organic Coconut Oil and Kirkland Organic Honey. I've noticed that Costco is carrying a lot more organic products, including fresh produce. I made the Carrot Ginger Soup earlier with the Coconut Oil, and I've been using it to make popcorn practically every day. I already use the Kirkland Organic Honey (comes in a three pack). When I get sick, the first thing that usually hits me is a sore throat. I always reach for my honey bear (shouldn't honey ALWAYS come in a honey bear?), lemon juice and lots of hot water. My folks use the honey as well - my dad likes honey as the sweetener in his coffee.

I chose to include dried pineapple, crystallized ginger and dried cranberries in the granola. You can have any dried fruit you want, although the crystallized ginger adds a special ginger flavor.

Honey Pineapple Ginger Granola
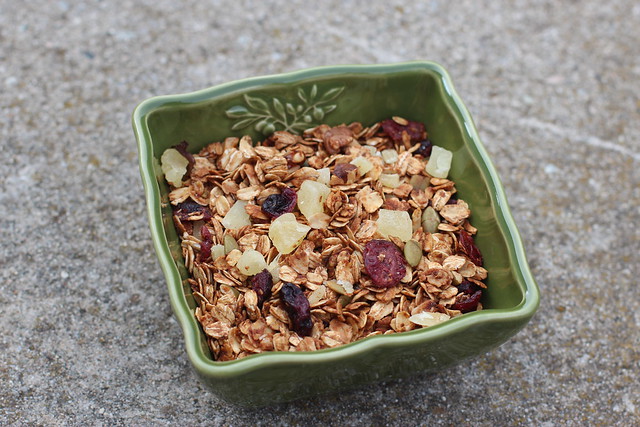
How do you eat your granola? I like mine on top of plain yogurt or cottage cheese!

Honey Pineapple Ginger Granola
Makes 3 cups of granola
Inspired by "Honey and Hazelnut Granola" by Valerie Bertinelli

2 cups oats (I used old fashioned oats)
1/8 cup (2 Tablespoons) walnuts, chopped
1/8 cup (2 Tablespoons) pepitas/pumpkin seeds
3 Tablespoons honey
1 Tablespoon coconut oil
1/2 teaspoon ground cinnamon
1/2 teaspoon ground ginger
1/4 teaspoon ground nutmeg
1/2 teaspoon kosher salt
1/2 cup dried diced pineapple
1/2 cup dried cranberries
2 pieces of crystallized ginger

1. Preheat oven to 325 degrees F.
2. Line a baking sheet with parchment paper.
3. In a large bowl, mix together the oats and nuts.
4. In a small saucepan, heat the honey and coconut oil until melted. Remove from heat.
5. Add spices and salt to the honey mixture, and stir to combine.
6. Pour hot mixture over the oats and nuts and stir until everything is well coated.
7. Spread oats onto baking sheet.
8. Bake until toasted, about 25-30 minutes. Mix at half-way point.
9. Let cool then add the chopped dried fruit. Store in an airtight container and enjoy!

Disclosure: Costco sent me some products to try including Kirkland Organic Coconut Oil and Kirkland Organic Honey. I was not paid for this post. Opinions are my own.
Pin It!

Carrot Ginger Soup with Coconut Oil

Saturday, March 5, 2016

Carrot Ginger Soup
Carrot Ginger Soup with Coconut Oil

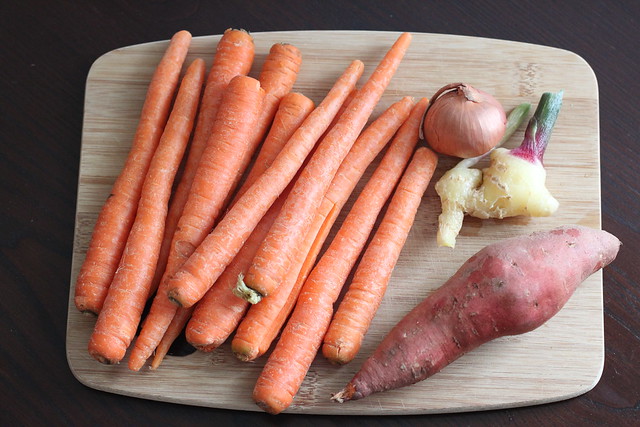
Soup for you! You have to make this delicious and yet easy to make soup! It's super fast too...in 30 minutes you get soup! And it reheats nicely in the microwave so it's perfect to bring to work too. The carrots have a little sweetness, the sweet potato adds body, and the ginger gives it such good flavor.

Carrot Ginger Soup
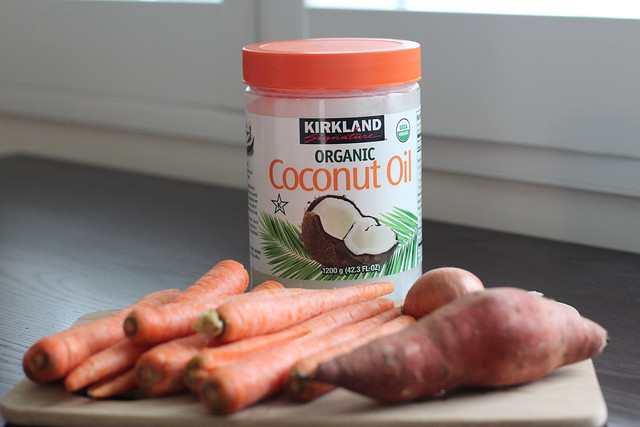
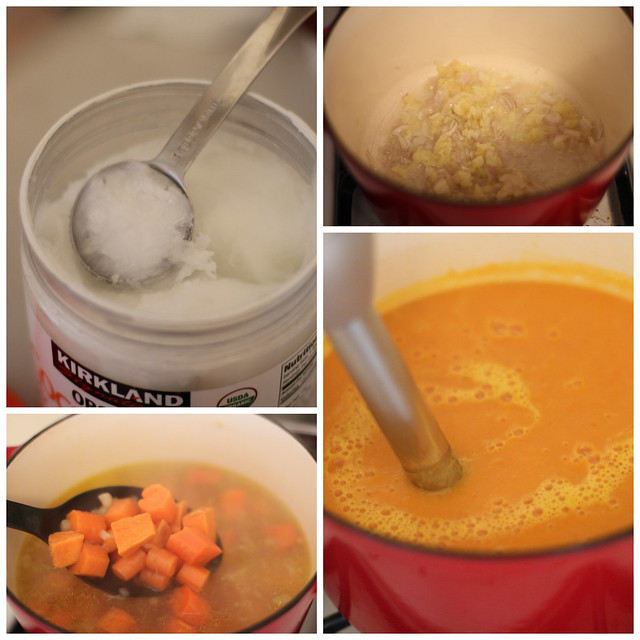
And why is there a huge tub of Organic Coconut Oil in this mise en place? Well, the nice folks at Costco reached out to me and gave me a few items from the store. I haven't used coconut oil before so it was a treat to get this. My family has been a member of Costco since the Price Club days. There are so many things I buy at Costco - contact lenses, gasoline, tires for my car, blueberries, raspberries, that rotisserie chicken, photo center for prints, King's Hawaiian rolls, Nestle Chocolate Chips, hella oral hygiene stuff (Sonicare toothbrushes, floss and those little pick things for between your teeth...yeah, a little TMI there), paper towels, TP, dog beds for Cidney, televisions (I've bought three for my family over the years), and yes, on occasion, the famous food court's frozen yogurt, slice of pizza and a hot dog with sauerkraut (yes, ask for the sauerkraut - it's on their secret menu). I can go on and on... what are your favorite items at Costco?

I'm extra excited because my Costco is getting a bigger Costco! The Torrance Costco is always so busy - it needs more room. They are building a bigger Costco right next door to the existing one...with more parking! It will even have a car wash!

Costco's Organic Virgin Coconut Oil makes your kitchen smell very tropical when you are cooking with it. (By the way, you may read about me hatin' on the coconut, but I only hate the coconut strands and flakes because they feel like dental floss. I love coconut flavored stuff.) Coconut oil has no cholesterol and can be used in place of oils and butter. It has a low melting temperature so although it is solid, it melts really quickly in your pan. I'm excited to try some new recipes - including a cake where the coconut oil replaces butter, and coconut oil popcorn! I'll post those when I attempt them!

Carrot Ginger Soup
The Carrot Ginger soup is so easy to make, and it takes about 30 minutes total!! You just saute the shallots and ginger in coconut oil, then put in the carrots, sweet potato and water. Cook until tender and then go crazy with your immersion blender!

This recipe can be vegan if you skip the optional yogurt or sour cream topping.
~ mary

P.S. NPR's Planet Money Show (my favorite!) did a great piece on the history of Costco and membership shopping. You should listen to it - it's very interesting!

FCC Disclosure: Costco gifted me Virgin Coconut Oil. Opinions are my own. Dude, I love Costco. 

Carrot Ginger Soup

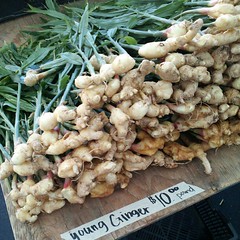
Young ginger at the farmers market.
I used Young Ginger I purchase from the Torrance Farmer's Market. It comes with big stalks and you can boil the leaves to make tea (photo from 2012 on the left). Young Ginger isn't as fibrous as regular ginger, and it is much more mellow than its older sibling. I love young ginger! It's only available for a short time so I buy a bunch and freeze it. NPR wrote a piece about young ginger you might want to read...and try to find some!

Carrot Ginger Soup

Carrot Ginger Soup
Adapted from: Martha Stewart Carrot Ginger Soup
Makes 6 cups, about 8 servings

1 shallot, minced
1 tablespoon or more minced ginger (I used young ginger that isn't as strong so I used a little more)
2 tablespoons coconut oil
1 pound carrots, peeled and chopped
1 medium sweet potato, peeled and chopped
4 cups water
Sea salt
Optional: Yogurt or sour cream

1. In a medium post, melt coconut oil and then add shallots and ginger. Cook over medium heat for 2 minutes.
2. Add carrots, sweet potato, water and a 1 teaspoon sea salt.
3. Bring to a boil, then simmer, covered, until the veggies are cooked and tender.
4. Use an immersion blender to blend the soup until smooth. You can also use a blender to puree the soup. Add salt to taste.
5. Serve soup with a dollop of yogurt or sour cream.
Pin It!