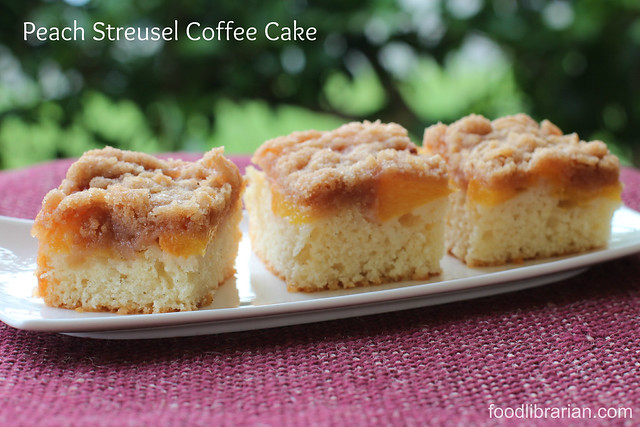
Peach Streusel Coffee Cake
It's stone fruit season. I'm in love.
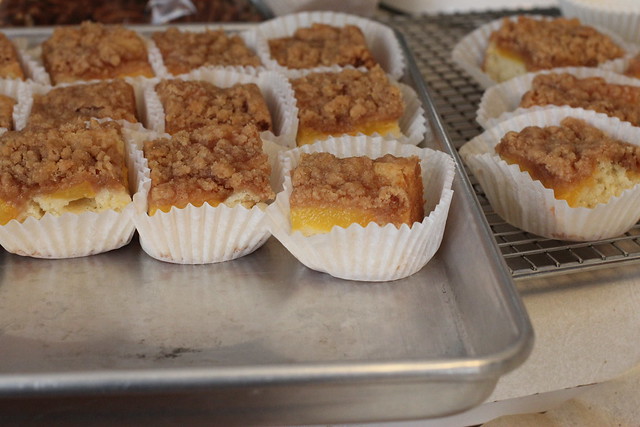
And I had a presentation to give at a meeting so I brought these. Know your audience :)
It's World Cup time! Looking forward to seeing all the games, the excitement of countries staying up to watch and cheer, lots of passionate tweets, and Cristiano Ronaldo. At work, we've been "researching" restaurants with the best TV placement for our lunches (looks like I'll be eating out for the next few weeks)!
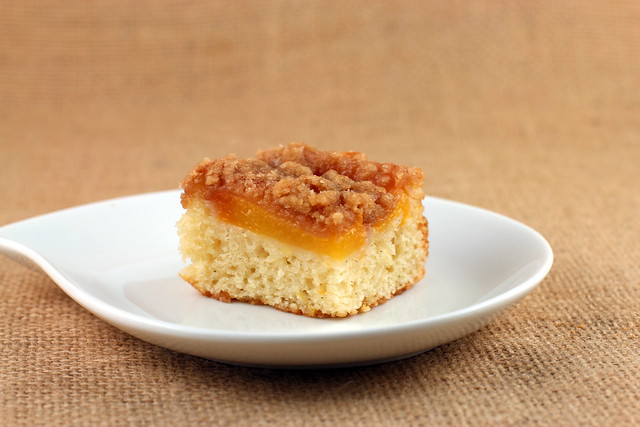
I love coffee cakes. Not very sweet, lovely topping and, in this case, a fruit surprise.
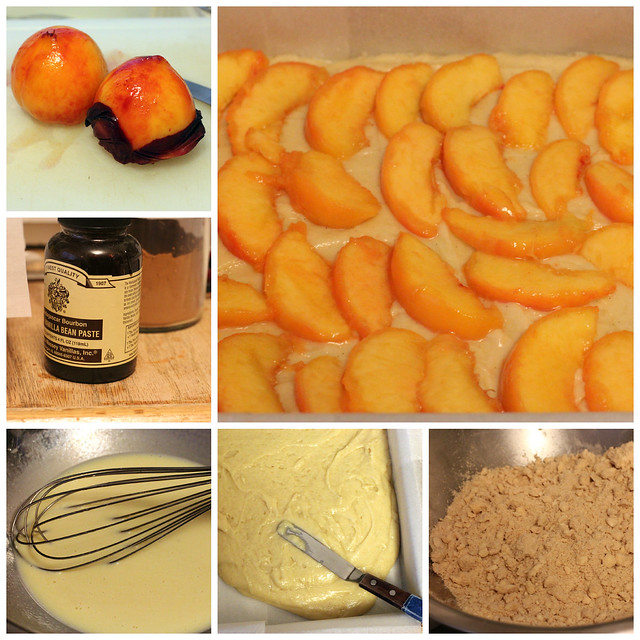
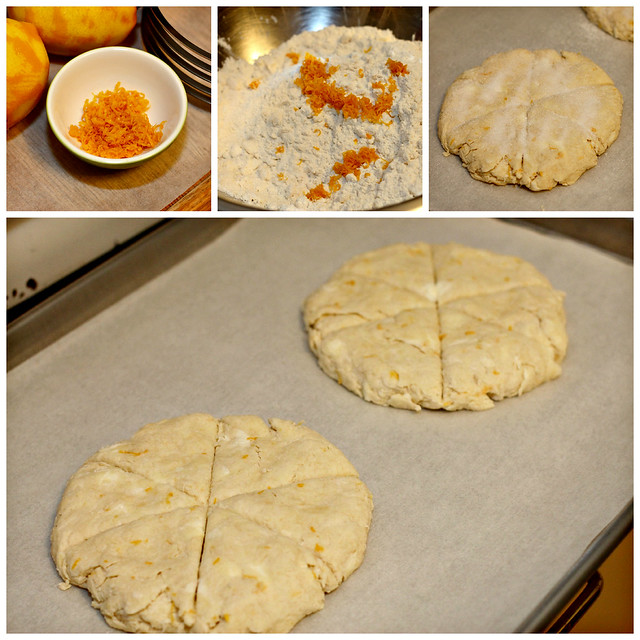
 I used two yellow peaches in the cake (sliced thin) but you can use other stone fruit. I'd like to try some cherries and apricots!
I also used Vanilla Bean Paste because it is awesome. Have you used it? It gives you all the flecks of vanilla but it is less expensive than whole vanilla beans.
Enjoy the World Cup! Between matches, make this cake! :)
Recipe:
Nectarine Streusel Coffee Cake
Adapted from Williams Sonoma's Peach Streusel Coffee Cake and they adapted it from Williams-Sonoma Collection Series, Muffins, by Beth Hensperger (2003).
Streusel:
3/4 cup (105 grams) all-purpose flour
1/3 cup (65 grams) firmly packed light brown sugar
1/4 cup (50 grams) granulated sugar
1 tsp. ground cinnamon
6 Tbs. (3/4 stick) cold unsalted butter, cut into small pieces
Cake:
1 1/2 cups (210 grams) all-purpose flour
3/4 cup (150 grams) granulated sugar
2 tsp. baking powder
1/2 tsp. salt
1 egg, at room temperature
4 Tbs. (1/2 stick) unsalted butter, melted
1/2 cup milk (I used whole milk)
2 teaspoons vanilla paste or vanilla extract
Original recipe has 1 tsp. almond extract, but I did not include it
2 firm, ripe nectarines or peaches peeled, pitted and sliced 1/2 inch thick
1. Preheat an oven to 350°F. Line a 9 x 9 baking pan with parchment paper. (The original recipe calls for a 9-inch round springform pan.)
2. Make the streusel: In a medium bowl, mix together the flour, brown and granulated sugars and cinnamon. Add the butter and, using a pastry blender or your fingers, cut or rub in the butter until coarse crumbs form. Place in refrigerator or freezer while assembling the rest of the cake.
3. Prepare the fruit: Peel the peaches (blanch in boiling water for 1 minute, then remove), pit and slice the fruit. I used two yellow peaches, but other stone fruits can be used.
4. Make the cake: Mix together flour, granulated sugar, baking powder and salt and set aside. In another bowl, using an electric mixer on medium speed or a wire whisk, beat the egg, melted butter, milk, vanilla and (almond extract, if using) until creamy, about 1 minute. (The recipe calls for "until creamy" but I beat the heck out of the mixture with a wire whisk and never got a "creamy" consistency - see above.) Add to the flour mixture and beat just until evenly moistened. There should be no lumps or dry spots. Do not overmix.
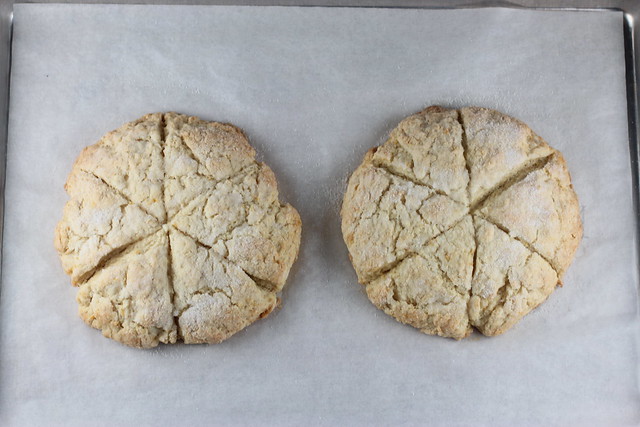
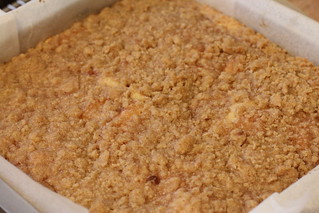
5. Spread batter into the prepared pan and spread evenly using an offset spatula. If using a springform pan, arrange the peach slices in concentric circles from the pan sides to the center. If using a square pan, arrange the slices in rows. Gently press the slices into the batter. Sprinkle evenly with the streusel.
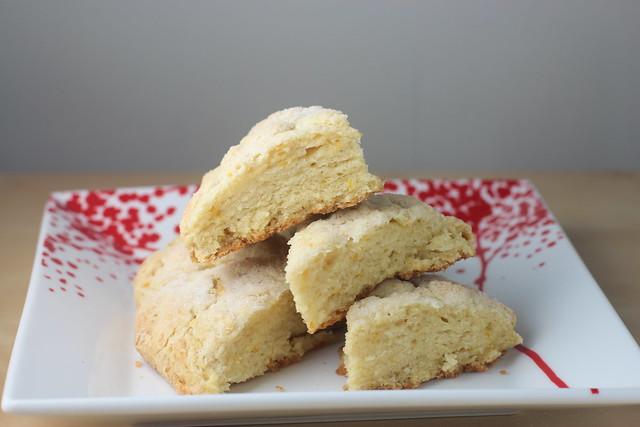
6. Bake until the topping is golden brown and a toothpick inserted into the center of the cake comes out clean, 40 to 45 minutes. Transfer the pan to a wire rack and let cool for 20 minutes. Can be served warm or at room temperature.