Girl Scout Thin Mint Scones

Monday, February 22, 2016

Girl Scout Thin Mint Scones

Girl Scout Thin Mint Scones

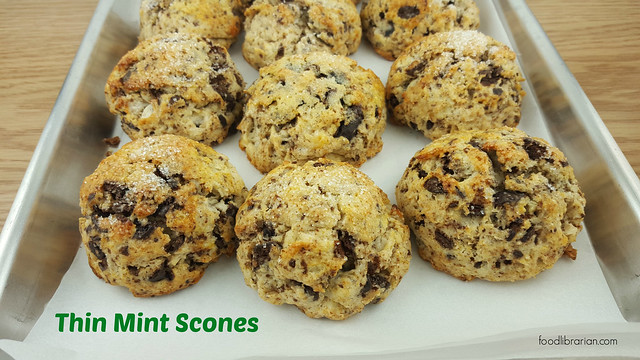
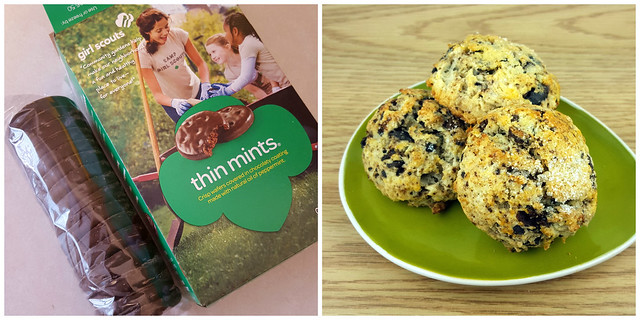
One of the best times of the year is Girl Scout Cookie Season! And what better way to bake with seasonal ingredients than to use Thin Mint Cookies!!!

I've made these before, but those scones were square and I wanted to tell you about the ease of scooping your scones. Well, there isn't much to tell. It's EASIER. It's FASTER. It's perfect when you are baking at 4 am!
Girl Scout Thin Mint Scones
I usually buy 8 boxes of Thin Mints for my "seasonally eating" season!
Girl Scout Thin Mint Scones
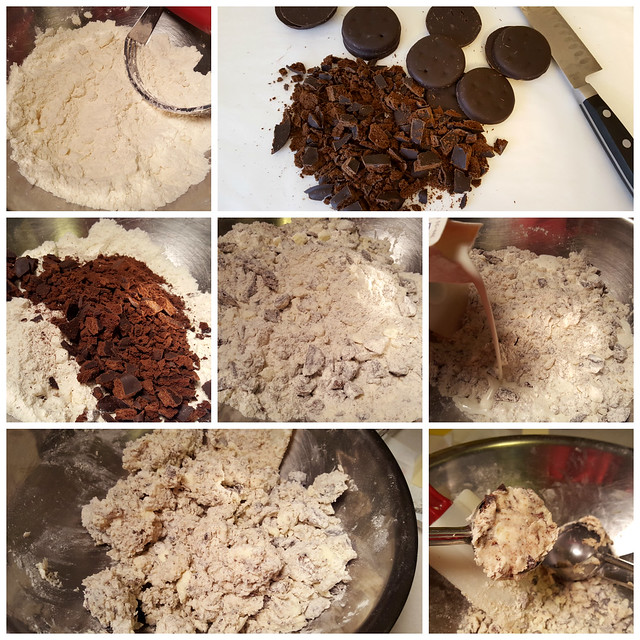
It's really easy to make scones. One bowl and no mixer. Doesn't get much easier than that!
Cut in the cold butter - you can use a pastry cutter, two knives or your fingers. Rough chop a sleeve of Girl Scout Thin Mint cookies. The packages seem to get smaller and smaller...I think this package has 16 cookies in one sleeve. Add this to the dough and mix to blend. Then you just stir in some heavy cream and mix together, but don't overmix. I use a scooper to make the scones - sometimes I make bigger scones with a bigger scoop, or more scones with a smaller scoop. You may need to press the dough into the scoop so everything holds together.
Girl Scout Thin Mint Scones
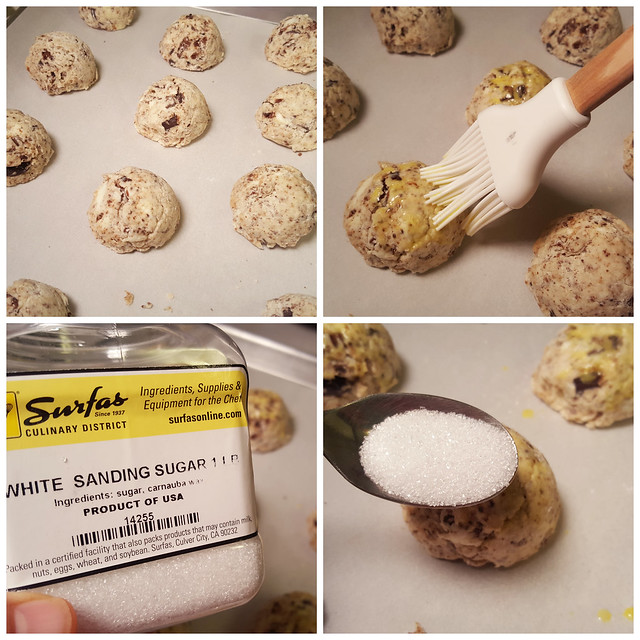
Brush an egg wash on the scones or you can use some extra heavy cream. I sprinkle some sanding sugar on top, but sugar in the raw or granulated sugar would work too. The "bigger" sugar gives a really nice crunch.
Girl Scout Thin Mint Scones
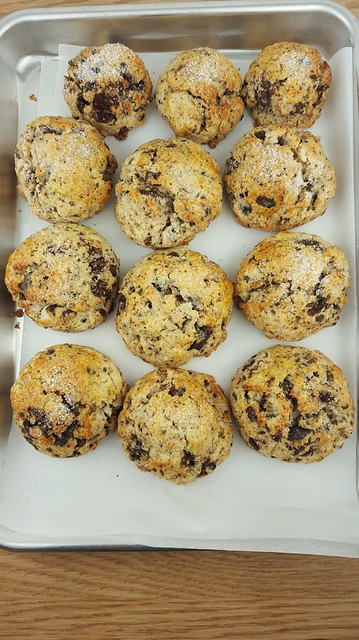
This batch has larger scones and a few smaller scones! Something for everyone!

Recipe: Thin Mint Scones
Adapted from: Cream Scones from the Art and Soul of Baking (page 152). This is a very good book - find it on Amazon or in your library.

Scone Dough:
2 cups (10 oz) all-purpose flour
1/4 cup (1 3/4 oz or 50 grams) granulated sugar
2 1/2 t baking powder
1/4 t salt
1 stick butter (4 oz) (cold, cut into pieces)
1 cup (8 oz) heavy whipping cream (cold)
1 c chopped Girl Scout Thin Mint cookies (one sleeve of 2016 cookies was 16 cookies)

Topping:
1 egg, lightly beaten OR more heavy whipping cream
2 T sanding sugar or granulated sugar

1. Preheat over to 425 degrees
2. Mix together dry ingredients.
3. Using a pastry cutter, two knives or your fingers, cut in the butter. (The book uses a food processor, but I like to make scones by hand...less to clean up!). Add the chopped Thin Mint cookies.
4. Pour in whipping cream. Blend together quickly (I use my hands and/or a spatula). Do not overmix.
5. Scoop scones (or you can form into a circle or square and then cut shapes).
6. Place on parchment or Silpat covered baking sheet. Brush with egg wash or heavy cream. Sprinkle with sugar.
8. Bake for 14-16 minutes (depending on your oven and size of scone) until golden brown and delicious.
Pin It!

Cara Cara Orange Scones

Tuesday, April 21, 2015

Cara Cara Orange Scones

I love the Cara Cara orange! It's sweet, pink, juicy and delicious. So, it deserves a scone!

I love making scones for a morning meeting. I need to leave the house at 6 am for my commute, so I try to prep the ingredients the night before...measuring the dry ingredients and putting out items to get to room temperature overnight if needed. But scones are so easy that I can often throw everything together, make the scones, pop them in the oven, get myself in the shower, quickly dress and then grab the scones from the oven.

Cara Cara Orange Scones
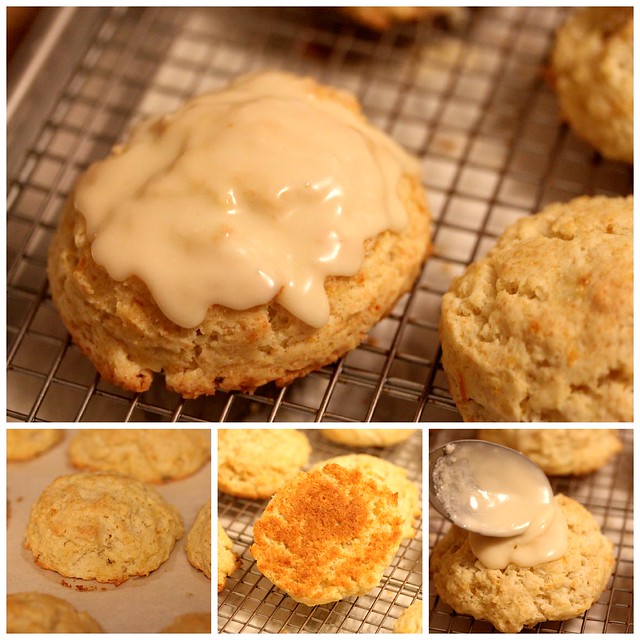
These are very rich, with butter, cream (pre-butter) and an egg. The glaze adds a lot of orange flavor.

Cara Cara Orange Scones

Recipe: Cara Cara Orange Scones

Scones:
2 cups (10 ounces) all-purpose flour
2 ounces sugar
2 1/2 teaspoon baking powder
1/4 teaspoon kosher salt
Zest of one Cara Cara orange
1 stick (4 ounces) butter, cold
1 cup (8 ounces) heavy whipping cream, cold
1 egg, cold

Glaze:
2 Tablespoons butter, melted
1 cup powdered sugar, sifted
1/2 teaspoon vanilla
2 Tablespoons fresh orange juice

1. Preheat oven to 425 degrees. Place a piece of parchment on a baking tray or half-sheet pan.
2. In a large bowl, mix together flour, sugar, baking powder and salt until combined.
3. Cut butter into flour mixture with a pastry blender/cutter until butter is pea-size
4. In a small bowl or measuring cup, mix together the cream and egg until well blended.
5. Add the cream/egg mixture to the dry ingredients and stir with a fork until moistened. Don't overmix.
6. Scoop scones with an ice cream scoop or #16 disher onto the baking sheet.
7. I got 11 scones from this batter.
8. Bake until golden brown about 14-16 minutes.
9. Remove scones onto a wire rack and let cool for 15 minutes before glazing.
10. To make the glaze, mix together the melted butter and the rest of the ingredients until smooth. Pour over the scones. Enjoy!
Pin It!

Oatmeal Maple Scones from the Flour Bakery Cookbook

Friday, April 17, 2015


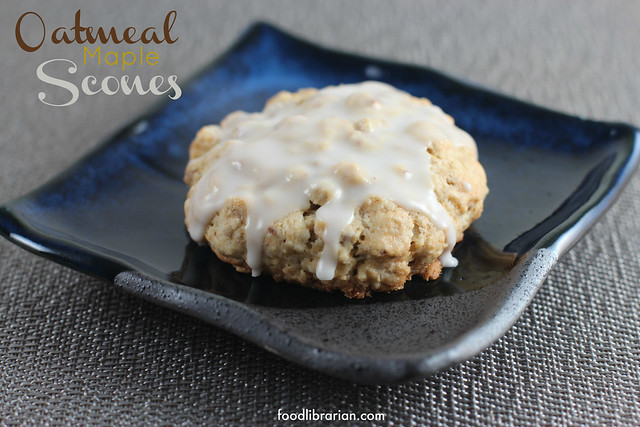
Oatmeal Maple Scones - Flour Bakery
Oatmeal Maple Scones from Flour Bakery cookbook

Three things:
Oatmeal
Maple Syrup
Scones

Please.

Just make these! Anytime you make them is fine. I could eat them all day long...breakfast, lunch, dinner or snack.

Oatmeal Maple Scones - Flour Bakery
These scones are from the totally awesome cookbook: Flour: Spectacular Recipes from Boston's Flour Bakery + Cafe. It's definitely one of my favorites. I can tell because it is all torn up, spilled on, and written in. Written next to this recipe? My feedback in a sharpie: "Excellent!"

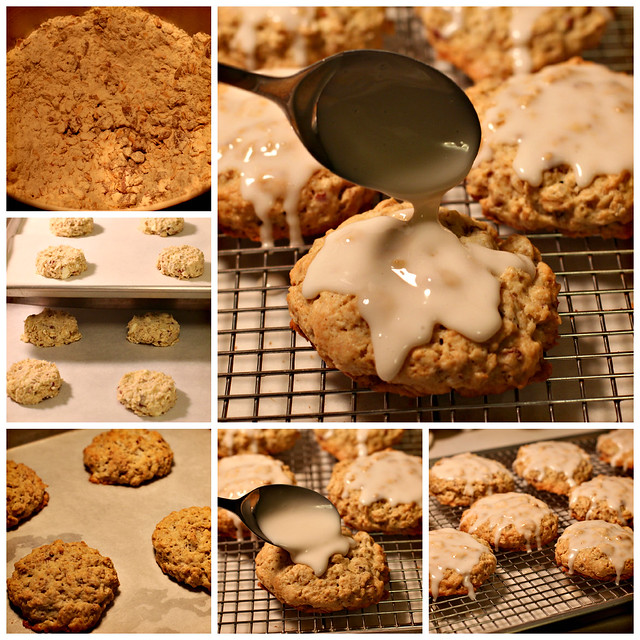
It's an easy scone recipe. The dough is "wetter" than others so it's simple to scoop it out onto a baking tray.

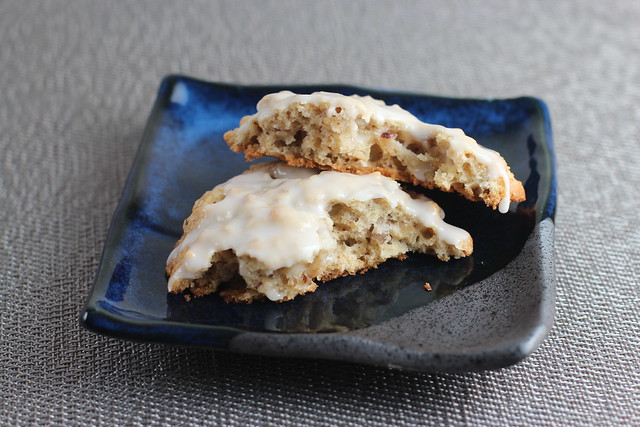
It has pecan pieces throughout the scone for a nice bite. You can add raisins or dried cranberries but I omitted the fruits.

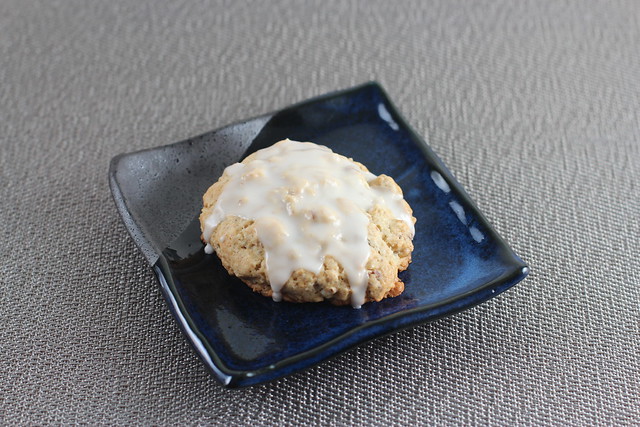
After they cool, you make a delicious maple syrup glaze. I mean, come on. Glazes are so lovely and just a little bit decadent. Just what you need in the morning.

Oatmeal Maple Scones from Flour Bakery Cookbook
Scones are perfect simplicity. Who wouldn't want one of these at a brunch, or in my case, a morning meeting at work?

Oatmeal Maple Scones from Flour Bakery Cookbook
Hello Beautiful!
Make these today!

Oatmeal Maple Scones
(Adapted from the cookbook - Flour: Spectacular Recipes from Boston's Flour Bakery + Cafe by Joanne Chang, page 41)
Find the book in your library or on Amazon!

Scones:
1 1/2 cups (210 grams) all-purpose flour
1 1/4 cup (125 grams) old-fashioned rolled oats (not quick)
1 1/2 teaspoons baking powder
1/4 teaspoon baking soda
1/4 teaspoon kosher salt
1/2 cup (50 grams) pecan halves, toasted and chopped
1/2 cup golden raisins or dried cranberries/cherries/etc (I omitted)
1/2 cup (1 stick) cold unsalted butter, cut into 10 pieces
1/3 cup heavy cream
1/2 cup maple syrup
1 teaspoon vanilla
1 egg, cold

Glaze:
1 cup (140 grams) powdered sugar, sifted
3 tablespoons maple syrup
1-2 tablespoons water

1. Preheat oven to 350 degrees. Place parchment paper on a half-sheet pan or baking tray.
2. Using a stand mixer with the paddle attachment, mix the flour, oatmeal, baking powder, baking soda, salt, pecans and fruit (if you are using it) on low speed until combined.
3. Drop in the butter pieces and beat on low speed for about 30-60 seconds until the butter has broken down into pea size pieces. You don't want the butter pieces too small.
4. In a separate bowl, whisk together the heavy cream, maple syrup, vanilla and egg.
5. With mixer still on low speed, add wet ingredients to dry mixture and blend for about 30 seconds until just combined. The batter will be slightly wet.
6. Use a rubber spatula to scrape down the sides of the bowl to make sure all the flour has been incorporated.
7. Scoop out with a #16 disher or ice cream scoop or 1/4 cup measuring cup onto your prepared baking tray. Joanne's recipe says you'll get 8 scones, but I got 10 scones After scooping the dough, I pressed down slightly on the mound.
8. Bake for 30-40 minutes, or until tops and bottoms are golden brown.
9. Transfer to wire cooling tray and let cool about 30 minutes. Place the cooling rack with the scones over the baking tray before glazing (I keep my piece of parchment on the tray so it catches the drips and makes clean up easier).
10. Glaze: Whisk together sifted powdered sugar, maple syrup and water. Once the scones have cooled, brush or spoon tops with glaze.


Pin It!

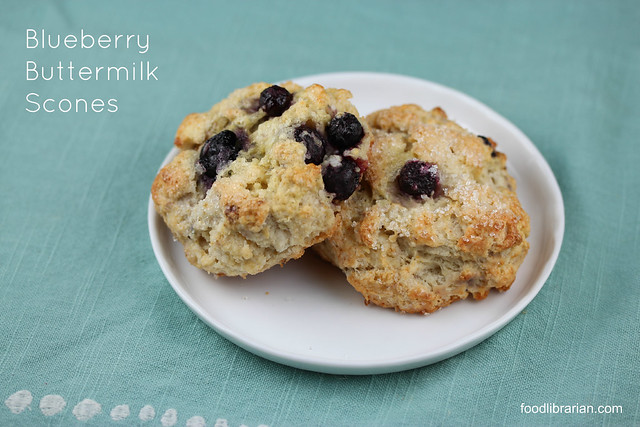
Blueberry Buttermilk Scones

Thursday, February 26, 2015

Blueberry Buttermilk Scones

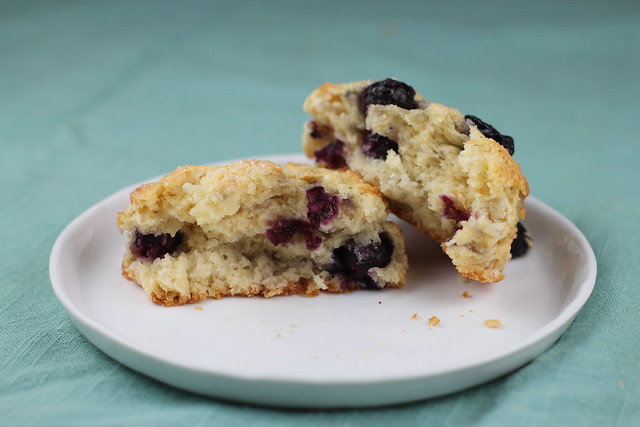
I bake in the morning.
I need to leave the house at 6 am for my commute to work.
Do the math.
So, I made these Blueberry Buttermilk Scones two days in a row at 4:15 am.
Why twice? Because the first time, I cut them incorrectly and made them too big. (Hey, it was before 5 am).

You should make these scones. Maybe even twice! But I'll let you sleep in. These would be great at a Sunday brunch.

Blueberry Buttermilk Scones
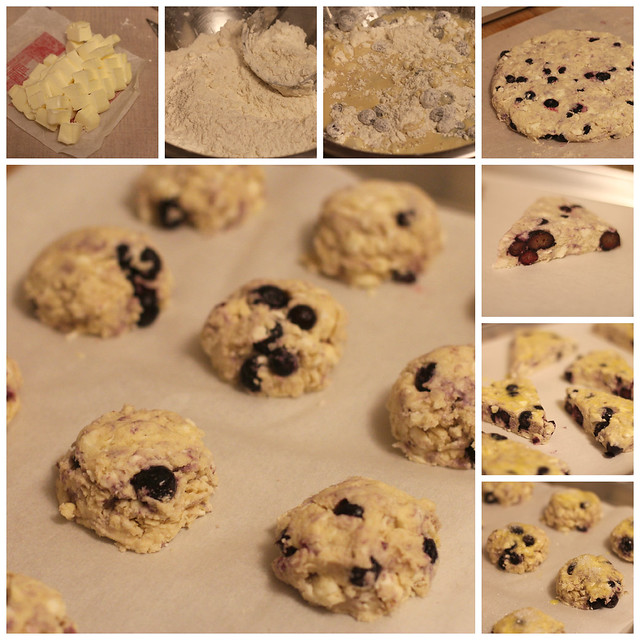
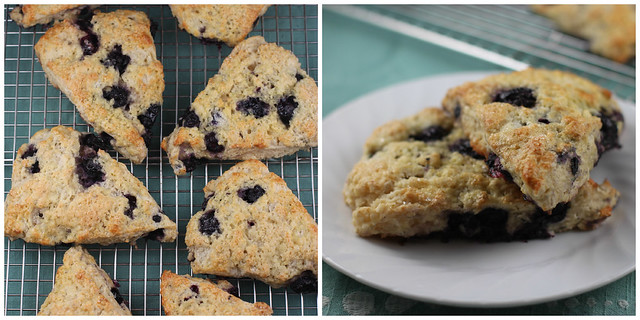
The first morning I made these, my circle cutting skills were way lacking. I was supposed to get cut it into 12 pieces, but I only cut them into 8 large pieces. Strangely, my mostly male co-workers were totally fine with the larger pieces (one said, "Then I only need to get one, and not seconds!")

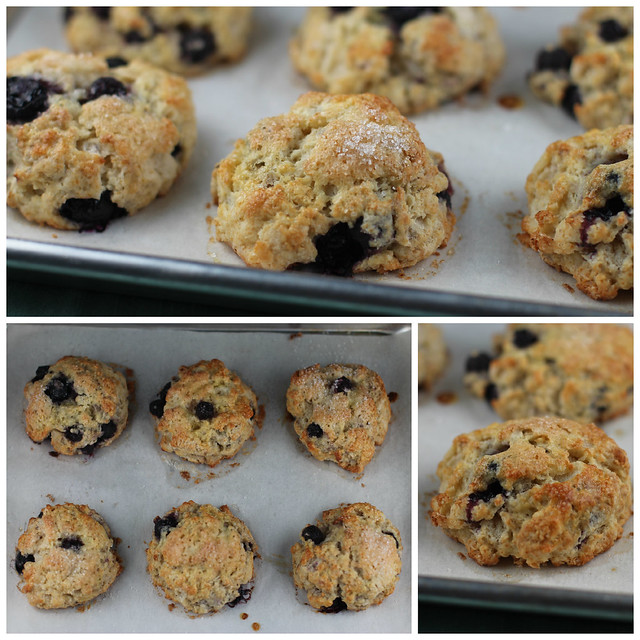
The second morning I made these, I scooped them with an ice cream scoop. This is much easier. You don't have to turn out the dough onto the counter, and can just scoop it out of the bowl. This time, I got 12 mostly round scones. I did pat down the tops a little before adding the egg wash.

On both mornings, I used frozen blueberries.

Blueberry Buttermilk Scones
Bake until nice and golden brown. I prefer the scooped, round scones - the blueberries stay whole. When you cut the dough, you also cut the blueberries.

Blueberry Buttermilk Scones
These scones are not overly sweet. In fact, you could add an extra tablespoon of sugar to the batter. Don't skip the sanding sugar on top either (in a pinch, you can use sugar in the raw or even granulated sugar) as it offers a nice crunch and sweetness. I've made a lot of scones with butter and heavy cream and those scones are richer (and more calories!). This scones uses buttermilk and butter so they aren't as rich.

Adapted from Martha Stewart Living

Blueberry Buttermilk Scones
Yield: 12 scones

Ingredients:
1 1/2 cups (210 grams) all-purpose flour
1/2 cup cake flour
3 T granulated sugar
1 T baking powder (original recipe: 2 1/2 teaspoon)
3/4 t kosher salt
1 stick (4 ounces) butter, cold and cut into pieces
1/2 cup buttermilk
1 cup blueberries (I used Trader Joe's frozen blueberries)
1 egg
1 t vanilla (original recipe 1/2 teaspoon)

Egg Wash (don't skip this)
1 egg
Sanding sugar

Directions:
1. Preheat oven to 375 degrees F.
2. In a large bowl, mix together the flour, cake flour, sugar, baking powder and salt.
3. Cut in butter with a pastry cutter until butter is pea sized. Add the blueberries and toss in the flour mixture.
4. In a small bowl, whisk together 1 egg, buttermilk and vanilla.
5. Using a fork, mix the liquid ingredients into the dry ingredients until it is mostly combined.
6. If you are making scone triangles or squares, turn dough onto a floured surface and knead gently a few times to incorporate the flour. Pat into a circle and cut into 12 pieces and place on a parchment lined baking tray.
7. If you are scooping the dough, scoop the dough and place on a parchment lined baking tray.
8. Lightly beat an egg. Brush the tops of the scones with the egg wash and top with sanding sugar.
9. Bake at 375 for 22-25 minutes until golden brown. Since I had frozen blueberries, it took 24 minutes.
Pin It!

Gingerbread Molasses Scones

Wednesday, November 19, 2014

Gingerbread Molasses Scones

I'm finally acknowledging that it's fall. Los Angeles is filled with Santa Ana winds (which translates into very hot, dry conditions) and no rain ever (huge drought). By the way, all those covered in snow? California will totally trade you some sunshine for some of your snowpack! :) Now that I see Christmas lights on homes (still too early), I'm finally starting to believe that it really is fall and Thanksgiving is only a week away.

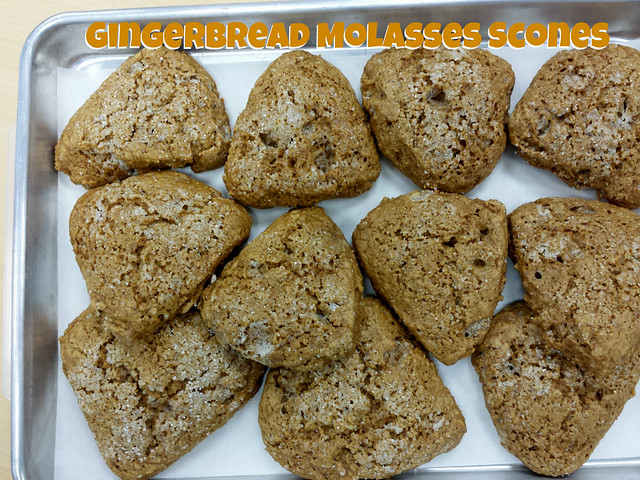
So, to celebrate fall and all its wonderful spices, here are some gingerbread scones.

I found this recipe on the Grandma's Molasses website. It only uses 1/2 stick of butter and regular milk, so it is "lighter" then the usual cream and hella butter scones (not that these scones are health food, but I have a baking blog so what do you expect?!) ;)

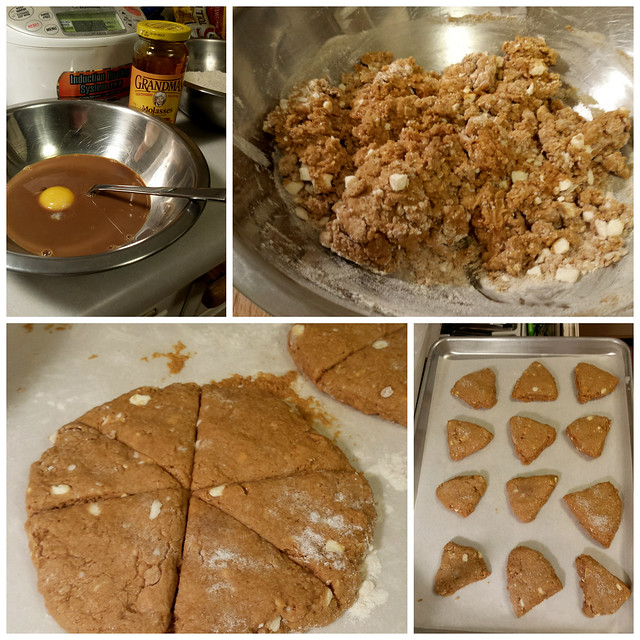
Sorry for the photos, I had to use my cell phone and it was dark in the kitchen.

Gingerbread Molasses Scones
The flour, sugar and spices are combined in a large bowl, and the cold butter is cut into the flour.

In a separate bowl, the molasses,milk and egg yolk are combined. The liquid and dry ingredients are quickly combined until just moistened, and then the dough is kneaded a few times. I should have kneaded mine a little more on the floured surface, because my dough was a little too wet.

The original recipe calls for one circle cut into 12 wedges. I made two circles and cut each into six wedges. (Those white pieces in the dough are small pieces of butter)

A quick brush egg white wash and a sprinkle of sugar completes the scone. The original recipe uses granulated sugar, but I substituted sanding sugar for a little extra crunch.

These were a hit with my coworkers at our morning meeting. Next time, I might add some diced crystallized ginger. I hope you make some for your friends and family this autumn.

Gingerbread Molasses Scones
Adapted from the Grandma's Molasses website (Their scones are much lighter colored compared to mine)

2 cups (280 g) flour
3 tablespoons (38 g) brown sugar
2 teaspoons baking powder
1 teaspoon ground ginger
1/2 teaspoon ground cinnamon
1/2 teaspoon baking soda
1/2 teaspoon kosher salt

1/4 cup cold butter (1/2 stick)

1/3 cup molasses (Grandma's recipe uses the Robust Molasses, but I used the Original Molasses)
1/2 cup milk (I used low-fat milk)
1 egg yolk

Topping:
1 egg white
Sanding sugar or granulated sugar

Preheat oven to 400°F.
1. In a large bowl, whisk together the dry ingredients.
2. Cut butter into dry ingredients using to knives, pastry cutter or your fingers until butter is the size of peas.
3.  In a medium bowl, combine the molasses, milk, and egg yolk until blended.
4. Add the molasses mixture to the dry ingredients, and stir with a fork until just moistened.
5. Turn the mixture onto floured surface and knead 6 - 8 times. Form the dough into a circle. I divide the dough into two balls and made two circles. Cut into wedges. I cut each of my circles into six wedges for a total of 12 scones.
6. Beat the egg white until frothy. Brush the scones with the egg white, and sprinkle with sanding sugar.
7. Bake at 400° for 12 to 15 minutes, until lightly golden brown.

Pin It!

Lemon Scones

Sunday, June 1, 2014

Lemon Scones
Lemon Scones

I made these scones in January and am finally getting around to posting them. I can't believe today is the first day of June! What happened to 2014?!

Lemon Scones
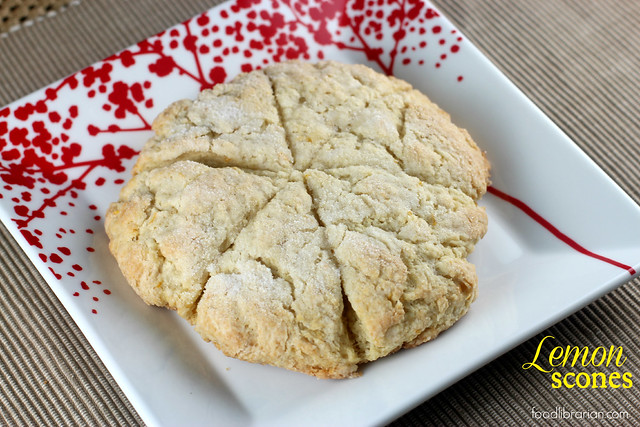
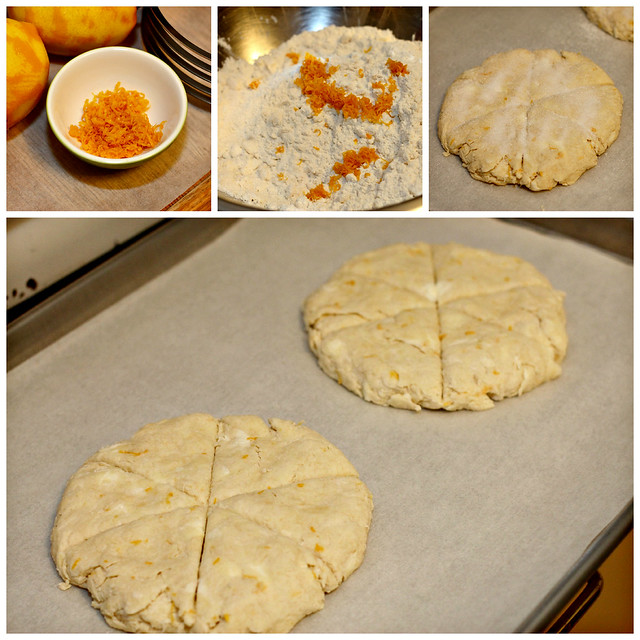
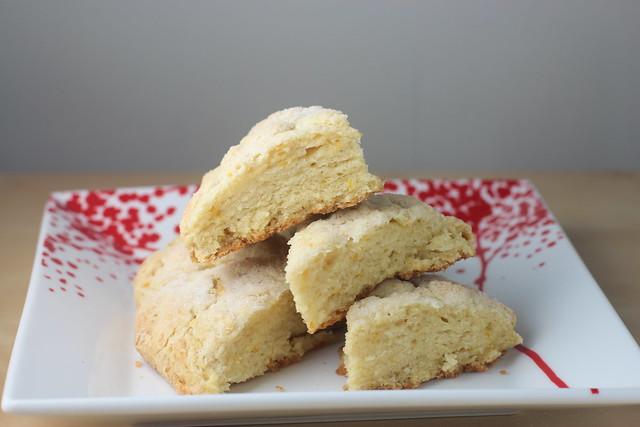
This is a super easy recipe. It uses buttermilk instead of heavy cream so I think it has a bit fewer calories (but don't worry, it has a stick of butter so it's plenty rich). The lemon flavor is delicate as zest is the only lemon flavor used in the recipe.

Remember, when making scones, you should be able to see little bits of butter. When heated, the water in the butter will create steam and cause the dough to puff up.

Lemon Scones
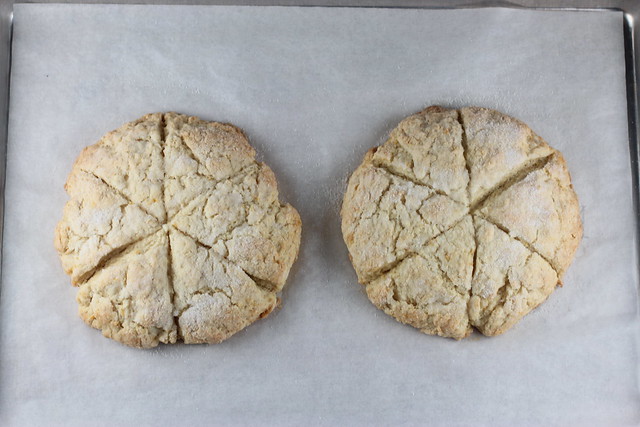
The original recipe from Taste of Home says you should make one large circle and cut it into 10-12 scones. However, I made two circles and made 12 scones from the two circles.

Lemon Scones
These are perfect with a cup of tea or coffee...perhaps some lemon curd or jam too.

Lemon Scones
Adapted from: Taste of Home

2 cups (280 grams) all-purpose flour
1/4 cup (50 grams) sugar plus additional sugar for top
1 teaspoon baking powder
1 teaspoon baking soda
1/4 teaspoon kosher salt
1/2 cup (1 stick) butter, cut into cubes
1/2 cup buttermilk
2 teaspoons grated lemon zest (original called for 1 1/2 teaspoons)

Preheat oven to 350 degrees.

In a medium bowl, whisk together flour, sugar, baking powder, baking soda and salt. Using a pastry cutter, two knives or your fingers, cut the butter into the flour mixture until the mixture resembles crumbs. Stir in the lemon peel. Pour the buttermilk over the mixture and stir until just mixed.

Turn onto a floured surface; knead a couple times and shape into two balls (or one big one). Place the ball on a parchment paper covered baking pan, and pat into a 1/2" to 3/4" thick circle. Using a knife, cut circle into wedges but don't go all the way through the dough - you are just scoring the dough. Sprinkle with sugar.

Bake at 350 degrees F for 20-25 minutes until lightly brown on the bottom and edges. Enjoy! These are good on their own, and can be served with butter, jam, or lemon curd.
Pin It!

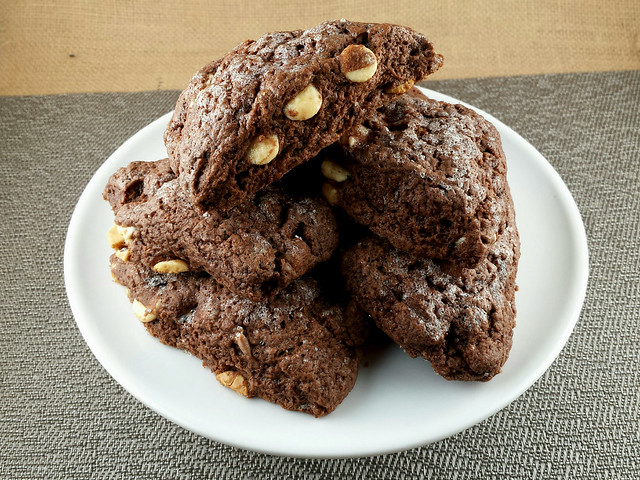
Chocolate Scones with White Chocolate Chips

Wednesday, May 21, 2014

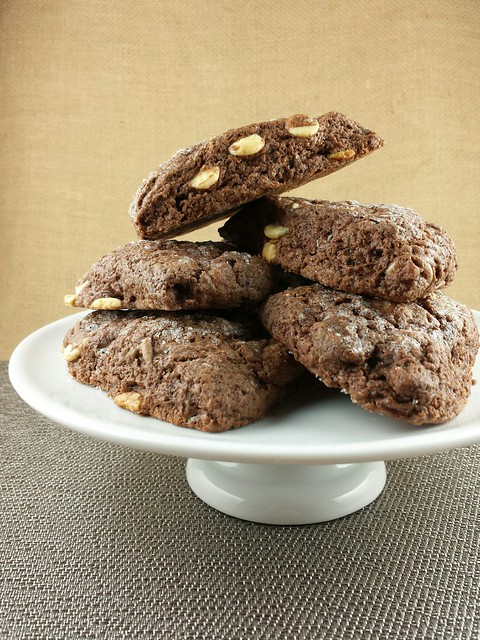
Chocolate Scones with White Chocolate Chips

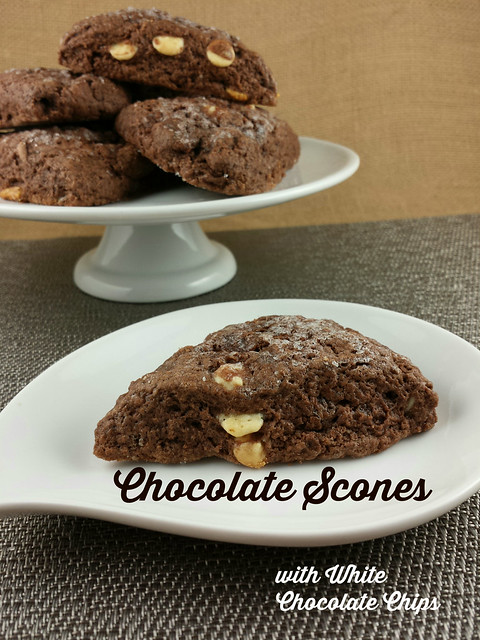
I was going through my chocolate stash and found some white chocolate chips that I forgot about. Thus, chocolate scones with white chocolate chips!

Chocolate Scones with White Chocolate Chips
I'm such a fan of scones. They are easy to make in the morning and are perfect for a morning meeting. My department has a standing weekly morning meeting, and I bought these to share.

After the meeting, I placed the "leftover" scones on a table for other staff to eat. I ran into a colleague later that morning holding one of the scones. As she walked by, she said, "I'll eat anything you bake. You can make mud pies and I'll eat 'em." Hee hee.

Chocolate Scones with White Chocolate Chips
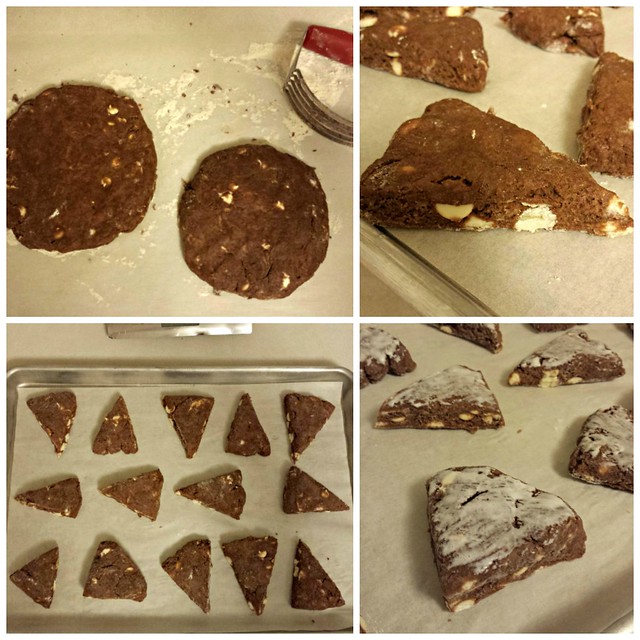
The dough comes together very quickly. Remember - don't overmix scones. I like to make smaller scones (more to share) so I made two circles and cut each into 8 pieces. Brush some cream on top and finish with a sprinkle of sanding sugar. (I totally use sanding sugar on everything...well, except a chicken dinner, but pretty much all baked goods!)

See you soon - I'm going to try and blog more...life has been really busy! Also, my nice camera is still MIA so these photos are from my Samsung phone.

I hope you make these scones someday. They make people happy. - mary

Chocolate Scones with White Chocolate Chips

Chocolate Scones with White Chocolate Chips
2/3 cup of heavy cream (plus a little more to brush on the scones)
1 large egg
1 teaspoon vanilla extract
1 3/4 cups (245 grams) all purpose flour
1/4 cup (25 grams) Dutch-processed unsweetened cocoa powder (I use Callebaut)
1/2 cup (100 grams) sugar
1 Tablespoon baking powder
1/4 teaspoon kosher salt
6 Tablespoons (75% of one stick of butter) cold unsalted butter, cut into small pieces
1/2 cup white chocolate chips
Sanding sugar (optional)

1. Preheat oven to 375 degrees F.
2. Mix together in the measuring cup or a small bowl the cream, egg and vanilla.
3. In a large bowl, whisk or sift together the flour, cocoa powder, sugar, baking powder and salt.
4. Cut the butter into the flour mixture with a pastry blender, two knives or your fingers until the butter is pea-size.
5. Add the white chocolate chips to the mix and stir to blend.
6. Pour the cream mixture over the batter and mix until just blended together. Don't overmix and it's okay if you don't get it all incorporated because you'll knead it a bit in the next step.
7. Place the dough on a floured surface and knead to pull everything together but try to handle the dough as little as possible.
8. For mini scones: I split the dough in half and made two circles and cut each into 8 wedges. If you want larger scones, you can press it into one circle and cut into 8 wedges.
9. Place the scones on a baking sheet (I use parchment paper for easy clean up) and brush the top with a little cream or milk. Sprinkle sanding sugar on top.
10. Bake for 17-20 minutes (depending on the size of the scones and your oven) until they are firm around the edges.
11. Cool on wire rack and enjoy!
Pin It!

Cream Scones with Milk Chocolate Toffee Bits

Tuesday, October 22, 2013

CreamSconesToffee
Cream Scones with Milk Chocolate Toffee Bits

You know when someone starts using email for the first time and writes everything in ALL CAPS, and you have to politely tell them that is the equivalent of screaming at their grandchild? (Happens all the time in the library)

Well, let me just tell you... MAKE THESE SCONES.

Cream Scones with Milk Chocolate Toffee Bits
These are fantastic. The scone is a great base for all sorts of goodies. Currants, mini chocolate chips, or, in my case, milk chocolate toffee bits. The scone is tender, light and a perfect treat.

milkchocolatetoffeebits
I really love you Heath Milk Chocolate Toffee Bits. Seriously love you.

Cream Scones Collage
You can pretty much make these scones in your sleep. That's why I love scones. I throw them together, pop them in the oven, jump in the shower and am rewarded with piping hot deliciousness before 6 am. Win.

I make my scones square because it is easier to shape and cut (and they look better when you are making small scones). You can also form them into a circle and cut into wedges - another very pretty thing. I hardly ever cut them with cookie cutter rounds because then you need to gather up the scraps and shape them again (too much effort and the scrap-made ones are always a bit lesser than the first round scones).

Anyway, however you shape them, make them. By the way, I also brushed some cream on top and topped with raw sugar.

I usually make my scones all by hand (with a pastry cutter), but I used a food processor to cut in the butter...and man, does it make it fast and easy!

Cream Scones with Milk Chocolate Toffee Bits
My co-worker IM'd me:  Hi Mary. I bet you could sell those scones for $100 dollars a piece. They are that delicious.

Cream Scones with Milk Chocolate Toffee Bits

Adapted from Smitten Kitchen (Dream Cream Scones) who adapted from America's Test Kitchen Cookbook (they used dried cranberries and currants in their recipe)

2 cups (10 ounces) unbleached all-purpose flour
1 Tablespoon baking powder
3 Tablespoons sugar
1/2 teaspoon kosher salt
5 tablespoons chilled, unsalted butter, cut into 1/4-inch cubes
1/2 cup Heath Milk Chocolate Toffee Bits
1 cup heavy cream (I use Trader Joe's heavy cream - it's not ultra-pasteurized)

1 or 2 Tablespoons of cream
Raw sugar or sanding sugar

Directions:
1. Preheat oven to 425°F.
2. You can cut the butter into the flour by hand or in a food processor. By Hand: Place flour, baking powder, sugar and salt in a large bowl and whisk together to blend. Food Processor: Place flour, baking powder, sugar and salt into food processor (steel blade) and pulse a few times to combine the ingredients.
3. By Hand: Cut the cold butter into the flour mixture with a pastry blender, your fingers or knives until you have small pieces of butter in the mix. Food Processor: Place butter on top of flour mixture in food processor, and pulse in one second intervals, about 10 times until the butter is cut into small bits. Don't overpulse...you want texture. Transfer to a large bowl.
4. Stir in the the toffee bits into the flour mixture.
5. Stir in heavy cream with a rubber spatula or fork until dough begins to form, about 30 seconds. It won't all come together and that's okay...you will knead it for a bit in a second.
5. Transfer dough to lightly floured countertop and knead dough by hand just until it comes together into a rough, sticky ball, 5 to 10 seconds.
6. Form dough into a square about 3/4 inch thick and cut into 16 or 25 scones. Or you can form into a round and cut into wedges.
7. With a pastry brush, brush each scone with some heavy cream and sprinkle with sugar in the raw or sanding sugar.
8. Place scones onto a baking sheet lined with parchment (for easier clean up, but if you don't have parchment, it can be ungreased) and bake in the oven until the bottoms are golden and the tops light brown, about 12-15 minutes, depending on size of the scones and your oven. Remove from oven and cool on rack.
9. Best eaten the day (or morning) they are made.
Pin It!

Crystallized Ginger Scones - Williams Sonoma

Wednesday, April 11, 2012

Crystallized Ginger Scones - Williams Sonoma
Crystallized Ginger Scones

There are very few flavors I love more than ginger. In fact, I can't think of any right now.

Ground ginger. Crystallized ginger. Fresh ginger in savories and sweets. Ginger tea.

Ah, ginger rocks.

Here are some ginger scones from a Williams-Sonoma's recipe that is an adaptation from the Zuni Cafe in San Francisco.

Whoo hoo! It's National Library Week. I love this quote from Eleanor Crumblehulme. You can get a t-shirt of it too! (Designed by Daniel Solis). I hope you are visiting your local library and checking it out (oh yes, we librarians are full of puns). I love all your sweet comments about the importance of libraries in your life and community!

Crystallized Ginger Scones - Williams Sonoma
Next time, I could have made these a bit thicker, but they were tasty. I also brushed on some cream and sanding sugar. Sanding sugar is happiness in little crystals. Put it on everything. Except maybe steak.

Crystallized Ginger Scones collage 1
This is supposed to make 8 scones, but I cut them with these cute biscuit cutters (smooth side) and got a bunch. And guess what? You can win a set of these cutters for National Library Week!! Enter until April 16, 2012!

Recipe:
Williams-Sonoma Crystallized Ginger Scones

2 cups (280 grams) all-purpose flour
1/4 cup sugar
1 Tablespoon baking powder
1/2 tsp. salt
8 Tbs. (1 stick) chilled unsalted butter, cut into small pieces
1/3 cup chopped crystallized ginger
1 egg
1/2 cup heavy cream

The Williams-Sonoma recipe uses a scone pan and food processor. I made mine by hand and cut them with biscuit cutters.

1. Preheat an oven to 350ºF.
2. In a large bowl, whisk together the flour, sugar, baking powder and salt.
3. Add the butter and using a pastry cutter or your fingers, combine until it resembles pea-size crumbs.
4. Add crystallized ginger and stir to mix.
5. In a small bowl, whisk together the egg and cream until blended and add to the flour mixture. Using a fork, stir to form large, moist clumps of dough.
6. Turn the dough out onto a lightly floured surface and press with your hands until the dough comes together. Roll out the dough, 3/4 inch thick. Cut into shapes and place on parchment lined pan.
7. Bake until the scones are golden, about 25 minutes.
8. Place scones on wire rack and let cool. Enjoy!
Pin It!

Girl Scout Thin Mint Scones

Thursday, March 8, 2012

Thin Mint Scones
Girl Scout Thin Mint Scones

My friend's daughters were selling Girl Scout cookies. My favorite time of the year! I helped them and left the order form out at work (along with this cute photo of the girls!) and sold 81 boxes of cookies at a couple work places! Um, I may or may not have purchased a bunch of said cookies. You know, supporting youth. I'm all for it.
Thin Mint Scones
Cream scones. Thin Mints. Match made in baking heaven!

Thin Mint Scones
I made the scones in the evening and cut them into 16 small squares. I put them on this 1/4 sheet pan and wrapped it tightly with plastic wrap. Then I froze them overnight. In the morning, you can just pop them in the oven (spread out on two 1/2 sheet pans) for a little longer than the recipe's recommended baking time. In my rush, I forgot to put the egg wash and sanding sugar on the scones before baking so your finished scone may look a bit different.

Thin Mint Scones
I chopped up less than one sleeve of Thin Mints (about 12-14 cookies). It was a little less than 1 cup...enough to give a Thin Mint taste with a few cookies remaining to eat while they bake! :)

Thin Mint Scones
Adapted from: Cream Scones from the Art and Soul of Baking (page 152). This is a very good book - find it on Amazon or in your library.

2 cups (10 oz) all-purpose flour
1/4 cup (1 3/4 oz) granulated sugar
2 1/2 t baking powder
1/4 t salt
1 stick butter (4 oz) (cold, cut into pieces)
1 cup (8 oz) heavy whipping cream (cold)
3/4-1 c chopped Thin Mint cookies (about 12-14 cookies) (less than 1 sleeve of Thin Mints (2012 box size))

Topping
1 egg, lightly beaten
2 T sanding sugar or granulated sugar

1. Preheat over to 425 degrees
2. Mix together dry ingredients.
3. Using a pastry cutter, two knives or your fingers (I use my fingers), cut in the butter. (The book uses a food processor, but I like to make scones by hand...less to clean up!)
4. Add whipping cream and chocolate chips. Blend together quickly (I use my hands and/or a spatula). Do not overmix.
5. Shape into a round or square.
6. Cut into shapes.
7. Place on parchment or Silpat covered baking sheet. Brush with egg wash. Sprinkle with sugar.
8. Bake for 14-16 minutes (depending on your oven) until golden brown and delicious. I cut my smaller and got 16 scones.
Other Thin Mint cookie baking ideas...

Girl Scout Thin Mint Brownies
Thin Mint Brownies

Thin Mint Pancakes
Thin Mint Brownies

Girl Scout Thin Mint Chocolate Cupcakes
Thin Mint Cupcakes
Pin It!

Ginger Scones from La Brea Bakery

Thursday, February 18, 2010

Ginger Scones - La Brea Bakery recipe
Make these.
Make these.
Make these.

Okay, that's pretty much my post about these ginger scones. Pretty simple message, no?

Ginger Scones - La Brea Bakery recipe
Cream, butter, just the right amount of sweetness and lots of crystallized ginger.
Yes, this is deliciousness in a little square.

Ginger Scones - La Brea Bakery recipe

Ginger Scones - La Brea Bakery recipe Ginger Scones - La Brea Bakery recipe
I used Trader Joe's crystallized ginger. It was the last of the package; I went back the other day and they were out...for the last two months! Eeck. I hope it comes back! I made my scones by hand. One bowl and way less to wash and clean. I used my fingertips to work in the cold butter and quickly, quickly mixed the liquid together. There isn't anything like making scones by hand in the morning. Mix, throw in the oven, take a shower, and come out to lovely scones.

Ginger Scones - La Brea Bakery recipe Ginger Scones - La Brea Bakery recipe
The recipe calls for round scones...but I made square scones. So much easier and you don't need to re-roll anything. I made small scones by dividing the dough into 25 pieces. Quick and easy.

Ginger Scones - La Brea Bakery recipe

Recipe:
Ginger Scones
Epicurious | October 2000
by Nancy Silverton from Nancy Silverton's Pastries from the La Brea Bakery

Click here for printable recipe or original on epicurious

2 1/4 cups unbleached pastry flour or unbleached all-purpose flour (I used AP flour)
1/3 cup granulated sugar
1 tablespoon baking powder
1 teaspoon finely chopped lemon zest (about 1/2 lemon) (I had used up my lemons and subbed orange zest)
1 1/2 sticks (6 ounces) unsalted butter, cut into 1-inch cubes and frozen
4 1/2 ounces candied ginger, finely chopped into 1/4-inch pieces to equal 2/3 cup
3/4 cup heavy cream, plus extra for brushing the tops of the scones

Adjust the oven rack to the middle position and preheat the oven to 400 F.

In the bowl of a food processor fitted with the steel blade or in the bowl of an electric mixer fitted with the paddle attachment, combine the flour, sugar, and baking powder, and pulse or mix on low to incorporate. Add the lemon zest and butter, and pulse on and off, or mix on low, until the mixture is pale yellow and the consistency of fine meal. (I mixed mine by hand. Using my fingertips, cut in the butter until the mixture had the consistency of sand.)

Transfer the mixture to a large bowl and stir in the ginger. Make a well in the center and pour in the cream. Using one hand, draw in the dry ingredients, mixing until just combined. (Do not overmix!!)

Wash and dry your hands and dust them with flour. Turn the dough out onto a lightly floured work surface and gently knead a few times to gather it into a ball. Roll or pat the dough into a circle about 3/4 inch thick. Cut out the circles, cutting as closely together as possible and keeping the trimmings intact. Gather the scraps, pat and press the pieces back together, and cut out the remaining dough. Place the scones 1 inch apart on a parchment-lined baking sheet. (I formed mine into a square and cut 25 pieces (5 x 5) They were mini scones.)

Brush the tops with the remaining cream. Bake for 12 to 16 minutes, until the surface cracks and they are slightly browned.
Pin It!