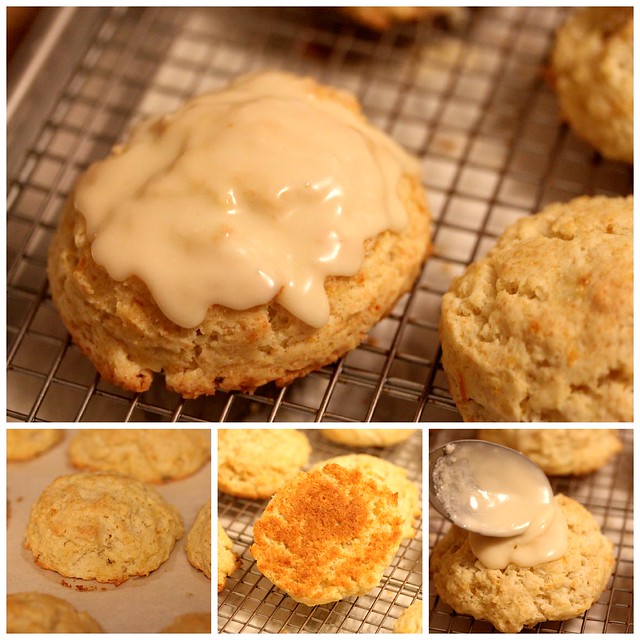
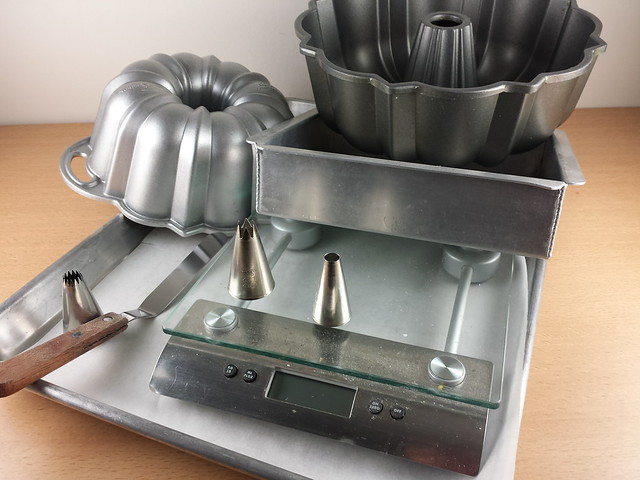
Cara Cara Orange Scones

Tuesday, April 21, 2015

Cara Cara Orange Scones

I love the Cara Cara orange! It's sweet, pink, juicy and delicious. So, it deserves a scone!

I love making scones for a morning meeting. I need to leave the house at 6 am for my commute, so I try to prep the ingredients the night before...measuring the dry ingredients and putting out items to get to room temperature overnight if needed. But scones are so easy that I can often throw everything together, make the scones, pop them in the oven, get myself in the shower, quickly dress and then grab the scones from the oven.

Cara Cara Orange Scones
These are very rich, with butter, cream (pre-butter) and an egg. The glaze adds a lot of orange flavor.

Cara Cara Orange Scones

Recipe: Cara Cara Orange Scones

Scones:
2 cups (10 ounces) all-purpose flour
2 ounces sugar
2 1/2 teaspoon baking powder
1/4 teaspoon kosher salt
Zest of one Cara Cara orange
1 stick (4 ounces) butter, cold
1 cup (8 ounces) heavy whipping cream, cold
1 egg, cold

Glaze:
2 Tablespoons butter, melted
1 cup powdered sugar, sifted
1/2 teaspoon vanilla
2 Tablespoons fresh orange juice

1. Preheat oven to 425 degrees. Place a piece of parchment on a baking tray or half-sheet pan.
2. In a large bowl, mix together flour, sugar, baking powder and salt until combined.
3. Cut butter into flour mixture with a pastry blender/cutter until butter is pea-size
4. In a small bowl or measuring cup, mix together the cream and egg until well blended.
5. Add the cream/egg mixture to the dry ingredients and stir with a fork until moistened. Don't overmix.
6. Scoop scones with an ice cream scoop or #16 disher onto the baking sheet.
7. I got 11 scones from this batter.
8. Bake until golden brown about 14-16 minutes.
9. Remove scones onto a wire rack and let cool for 15 minutes before glazing.
10. To make the glaze, mix together the melted butter and the rest of the ingredients until smooth. Pour over the scones. Enjoy!
Pin It!

Oatmeal Maple Scones from the Flour Bakery Cookbook

Friday, April 17, 2015


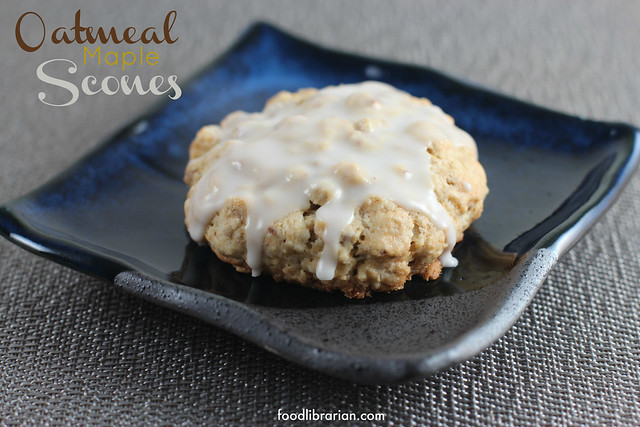
Oatmeal Maple Scones - Flour Bakery
Oatmeal Maple Scones from Flour Bakery cookbook

Three things:
Oatmeal
Maple Syrup
Scones

Please.

Just make these! Anytime you make them is fine. I could eat them all day long...breakfast, lunch, dinner or snack.

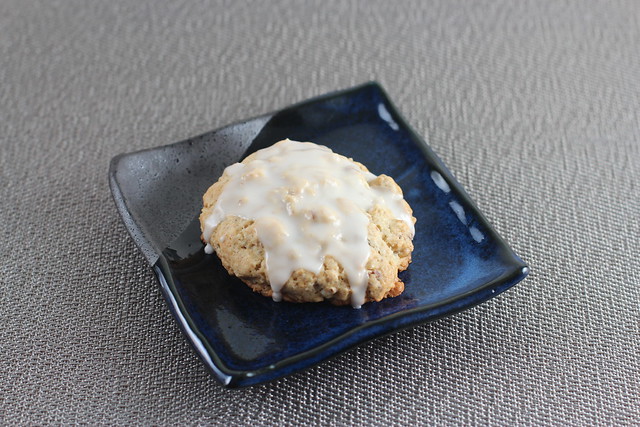
Oatmeal Maple Scones - Flour Bakery
These scones are from the totally awesome cookbook: Flour: Spectacular Recipes from Boston's Flour Bakery + Cafe. It's definitely one of my favorites. I can tell because it is all torn up, spilled on, and written in. Written next to this recipe? My feedback in a sharpie: "Excellent!"

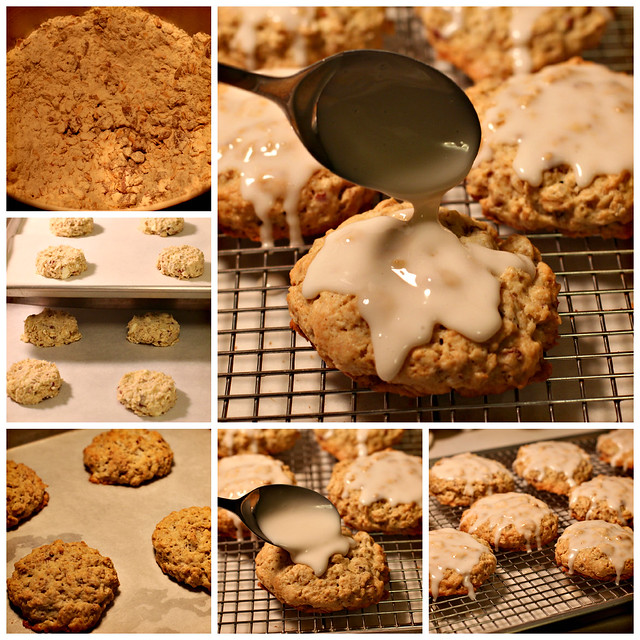
It's an easy scone recipe. The dough is "wetter" than others so it's simple to scoop it out onto a baking tray.

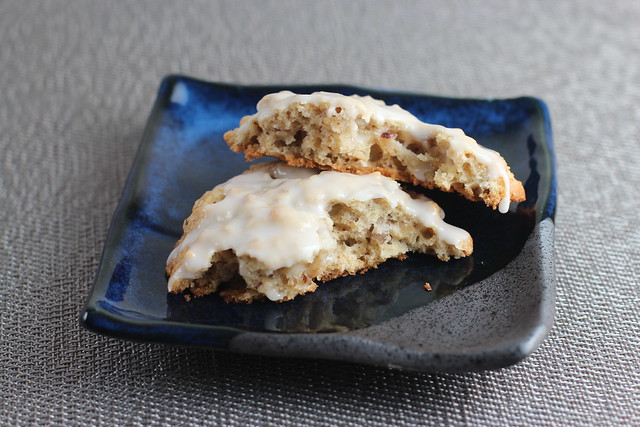
It has pecan pieces throughout the scone for a nice bite. You can add raisins or dried cranberries but I omitted the fruits.

After they cool, you make a delicious maple syrup glaze. I mean, come on. Glazes are so lovely and just a little bit decadent. Just what you need in the morning.

Oatmeal Maple Scones from Flour Bakery Cookbook
Scones are perfect simplicity. Who wouldn't want one of these at a brunch, or in my case, a morning meeting at work?

Oatmeal Maple Scones from Flour Bakery Cookbook
Hello Beautiful!
Make these today!

Oatmeal Maple Scones
(Adapted from the cookbook - Flour: Spectacular Recipes from Boston's Flour Bakery + Cafe by Joanne Chang, page 41)
Find the book in your library or on Amazon!

Scones:
1 1/2 cups (210 grams) all-purpose flour
1 1/4 cup (125 grams) old-fashioned rolled oats (not quick)
1 1/2 teaspoons baking powder
1/4 teaspoon baking soda
1/4 teaspoon kosher salt
1/2 cup (50 grams) pecan halves, toasted and chopped
1/2 cup golden raisins or dried cranberries/cherries/etc (I omitted)
1/2 cup (1 stick) cold unsalted butter, cut into 10 pieces
1/3 cup heavy cream
1/2 cup maple syrup
1 teaspoon vanilla
1 egg, cold

Glaze:
1 cup (140 grams) powdered sugar, sifted
3 tablespoons maple syrup
1-2 tablespoons water

1. Preheat oven to 350 degrees. Place parchment paper on a half-sheet pan or baking tray.
2. Using a stand mixer with the paddle attachment, mix the flour, oatmeal, baking powder, baking soda, salt, pecans and fruit (if you are using it) on low speed until combined.
3. Drop in the butter pieces and beat on low speed for about 30-60 seconds until the butter has broken down into pea size pieces. You don't want the butter pieces too small.
4. In a separate bowl, whisk together the heavy cream, maple syrup, vanilla and egg.
5. With mixer still on low speed, add wet ingredients to dry mixture and blend for about 30 seconds until just combined. The batter will be slightly wet.
6. Use a rubber spatula to scrape down the sides of the bowl to make sure all the flour has been incorporated.
7. Scoop out with a #16 disher or ice cream scoop or 1/4 cup measuring cup onto your prepared baking tray. Joanne's recipe says you'll get 8 scones, but I got 10 scones After scooping the dough, I pressed down slightly on the mound.
8. Bake for 30-40 minutes, or until tops and bottoms are golden brown.
9. Transfer to wire cooling tray and let cool about 30 minutes. Place the cooling rack with the scones over the baking tray before glazing (I keep my piece of parchment on the tray so it catches the drips and makes clean up easier).
10. Glaze: Whisk together sifted powdered sugar, maple syrup and water. Once the scones have cooled, brush or spoon tops with glaze.


Pin It!

Crispy-Topped Brown Sugar Bars - Tuesday with Dorie

Tuesday, March 24, 2015

Crispy Topped Brown Sugar Bars - Tuesdays with Dorie
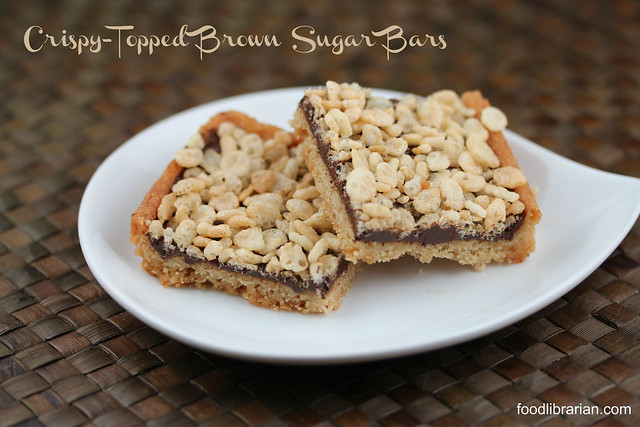
Crispy-Topped Brown Sugar Bars

Whew! I made it by 2 hours! I'm back with Tuesdays with Dorie. Oh, I lost a couple months due to the holidays and a full week of the flu...but I couldn't miss today! It's a bar with Rice Krispies on top!

Crispy Topped Brown Sugar Bars - Tuesdays with Dorie
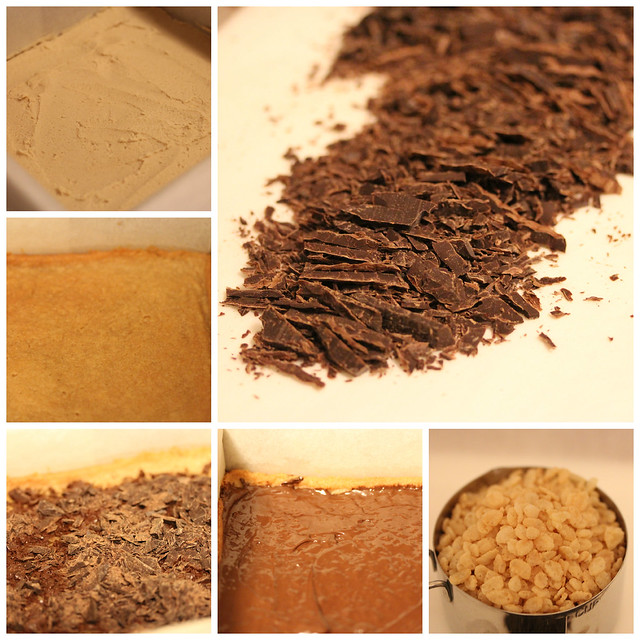
These were super simple to make. A brown sugar shortbread is baked until golden brown. Then, you spread chopped chocolate (I used Trader Joe's Dark Chocolate block) on top and let it melt a bit. A quick spread of the chocolate creates a space for your cereal!

You can put a caramelized cereal topping too. Look at the book for this yummy option.

Crispy Topped Brown Sugar Bars - Tuesdays with Dorie

Tuesdays with Dorie doesn't publish the recipe. You should get Dorie's book: Baking Chez Moi: Recipes from My Paris Home to Your Home Anywhere (this recipe is on page 324)! I love all the recipes in the book and Dorie's kind words and encouragement. In this recipe, she says, "show it who's boss" referring the shortbread dough. Love it!

Be sure to check out the other Tuesdays with Dorie bakers and their take on this yummy recipe!

P.S. I love my 8 x 8 x 2 pan. It's by Magic Line/Parrish. The edges are perfectly square so you get sharp edges on brownies, cakes, etc. I have 8" and 9" square pans, as well as 9" x 13" rectangle pans too. And they are made in Los Angeles! (I've visited the factory store...here's a post about it)

Pin It!

Blueberry Buttermilk Scones

Thursday, February 26, 2015

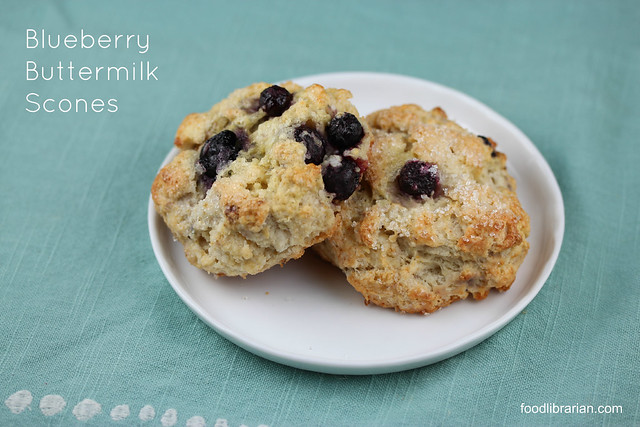
Blueberry Buttermilk Scones

I bake in the morning.
I need to leave the house at 6 am for my commute to work.
Do the math.
So, I made these Blueberry Buttermilk Scones two days in a row at 4:15 am.
Why twice? Because the first time, I cut them incorrectly and made them too big. (Hey, it was before 5 am).

You should make these scones. Maybe even twice! But I'll let you sleep in. These would be great at a Sunday brunch.

Blueberry Buttermilk Scones
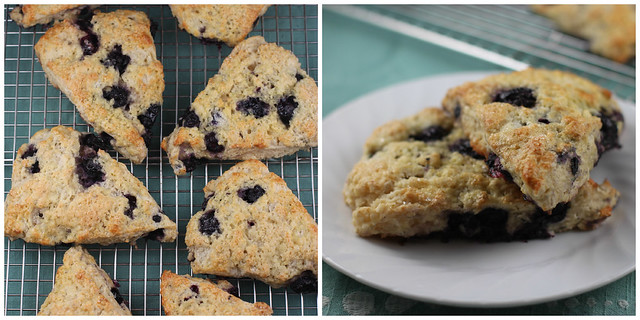
The first morning I made these, my circle cutting skills were way lacking. I was supposed to get cut it into 12 pieces, but I only cut them into 8 large pieces. Strangely, my mostly male co-workers were totally fine with the larger pieces (one said, "Then I only need to get one, and not seconds!")

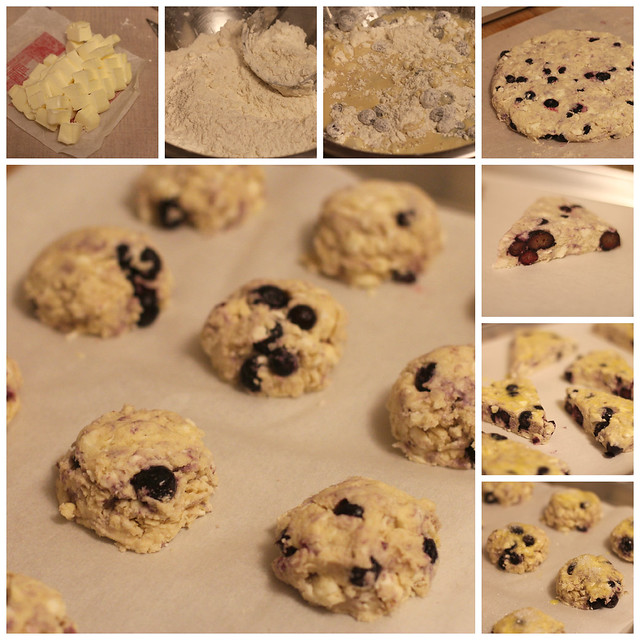
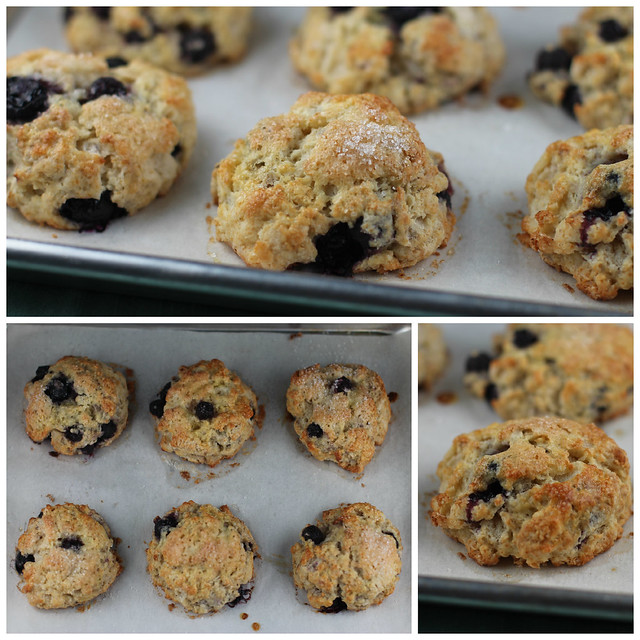
The second morning I made these, I scooped them with an ice cream scoop. This is much easier. You don't have to turn out the dough onto the counter, and can just scoop it out of the bowl. This time, I got 12 mostly round scones. I did pat down the tops a little before adding the egg wash.

On both mornings, I used frozen blueberries.

Blueberry Buttermilk Scones
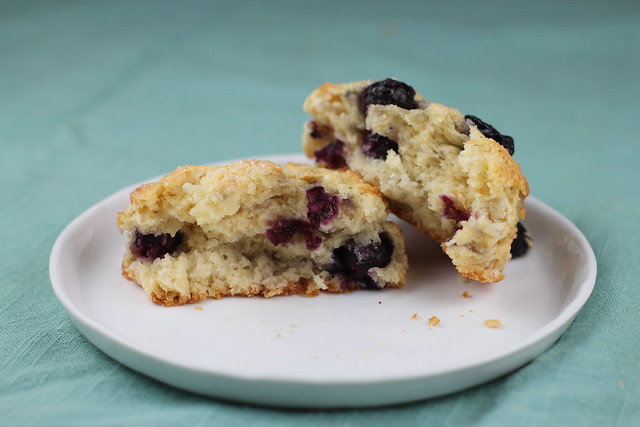
Bake until nice and golden brown. I prefer the scooped, round scones - the blueberries stay whole. When you cut the dough, you also cut the blueberries.

Blueberry Buttermilk Scones
These scones are not overly sweet. In fact, you could add an extra tablespoon of sugar to the batter. Don't skip the sanding sugar on top either (in a pinch, you can use sugar in the raw or even granulated sugar) as it offers a nice crunch and sweetness. I've made a lot of scones with butter and heavy cream and those scones are richer (and more calories!). This scones uses buttermilk and butter so they aren't as rich.

Adapted from Martha Stewart Living

Blueberry Buttermilk Scones
Yield: 12 scones

Ingredients:
1 1/2 cups (210 grams) all-purpose flour
1/2 cup cake flour
3 T granulated sugar
1 T baking powder (original recipe: 2 1/2 teaspoon)
3/4 t kosher salt
1 stick (4 ounces) butter, cold and cut into pieces
1/2 cup buttermilk
1 cup blueberries (I used Trader Joe's frozen blueberries)
1 egg
1 t vanilla (original recipe 1/2 teaspoon)

Egg Wash (don't skip this)
1 egg
Sanding sugar

Directions:
1. Preheat oven to 375 degrees F.
2. In a large bowl, mix together the flour, cake flour, sugar, baking powder and salt.
3. Cut in butter with a pastry cutter until butter is pea sized. Add the blueberries and toss in the flour mixture.
4. In a small bowl, whisk together 1 egg, buttermilk and vanilla.
5. Using a fork, mix the liquid ingredients into the dry ingredients until it is mostly combined.
6. If you are making scone triangles or squares, turn dough onto a floured surface and knead gently a few times to incorporate the flour. Pat into a circle and cut into 12 pieces and place on a parchment lined baking tray.
7. If you are scooping the dough, scoop the dough and place on a parchment lined baking tray.
8. Lightly beat an egg. Brush the tops of the scones with the egg wash and top with sanding sugar.
9. Bake at 375 for 22-25 minutes until golden brown. Since I had frozen blueberries, it took 24 minutes.
Pin It!

Chocolate Chip Cookies from WD-50

Friday, February 20, 2015

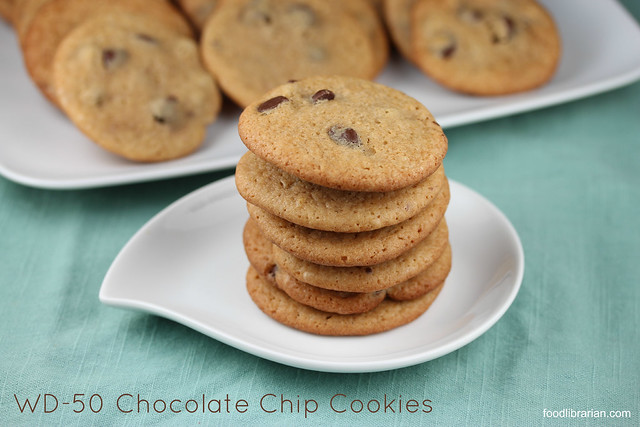
WD-50 Chocolate Chip Cookies
Chocolate Chip Cookies from WD-50

I usually make the Jacque Torres New York Times Chocolate Chip Cookies but they take 2 days to prep (gotta let the batter rest in the refrig). I didn't have that time so I went looking for an alternate. These Chocolate Chip Cookies were on the New York Times Cooking website and are from WD-50 restaurant in NY.

WD-50 Chocolate Chip Cookies
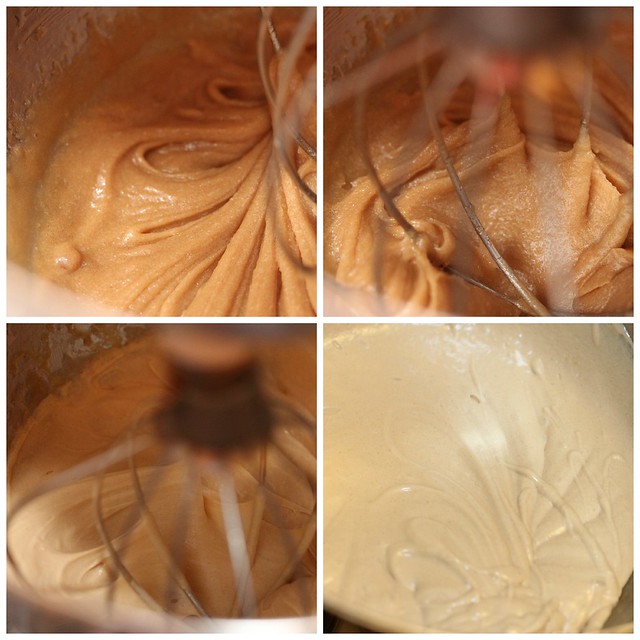
These cookies have an interesting prep. It starts melted butter whipped together with sugars for 3 minutes (top two photos). It's pretty unusual to use the whisk attachment for cookies! Then you whip in eggs and let that go for 6 minutes (bottom two photos).

WD-50 Chocolate Chip Cookies
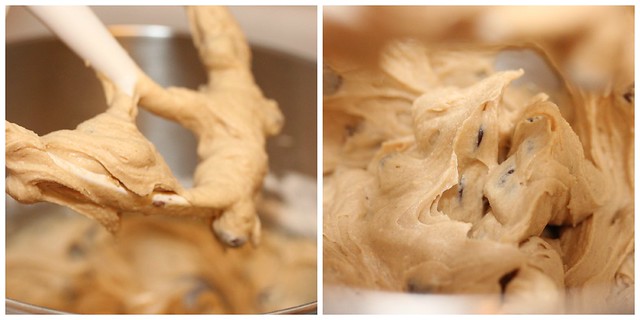
After adding the flour mixture (using bread and AP flour) and chocolate chips with a paddle attachment, the dough is very soft and wet. You need to refrigerate it until scoopable (I let mine rest overnight).

WD-50 Chocolate Chip Cookies
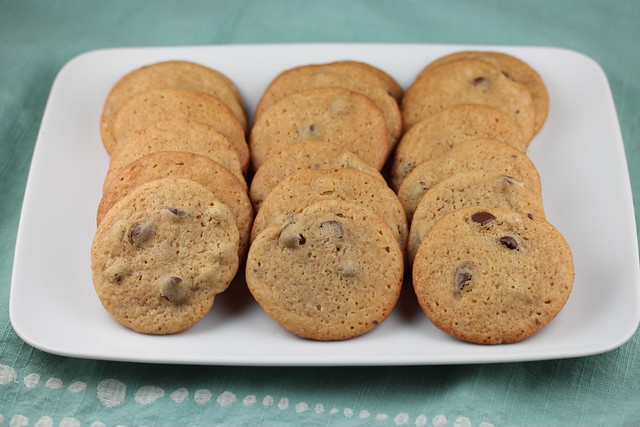
According to the recipe, the yield was supposed to be three dozen but I was three short of that.

WD-50 Chocolate Chip Cookies
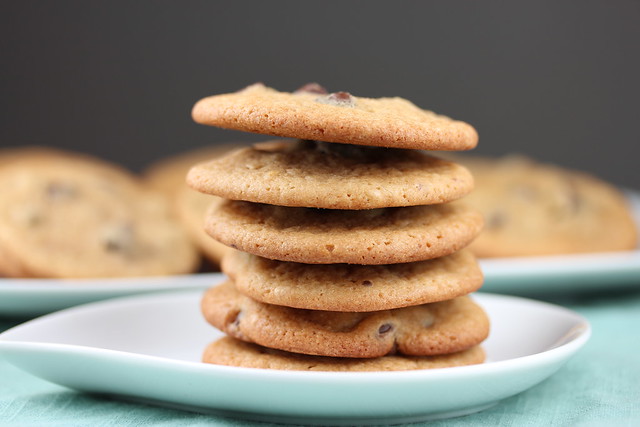
These cookies are thin & flat with slightly crispy edges, but retain a soft middle. I would add more chocolate chips than the recipe to give it more chocolate flavor. I really enjoyed the taste of the "non-chocolate" cookie part - very nice!

Chocolate Chip Cookies from WD-50

Adapted from Malcolm Livingston II, WD-50, New York Times Cooking website

11 tablespoons/150 grams unsalted butter, melted
1/2 cup/100 grams packed dark brown sugar
1/2 cup/88 grams granulated sugar
1 egg plus 1 yolk
1 cup/150 grams bread flour
1/3 cup/50 grams all­-purpose flour
1 teaspoon/4 grams salt (I used kosher salt)
1/4 teaspoon baking soda
1/4 teaspoon baking powder
3/4 cup/125 grams chocolate chips (I used Nestle semi-sweet. Next time, I would use a full cup of chips)
(Note: There is no vanilla in this recipe)

1. In a standing mixer with the WHISK attachment, whip the butter, brown sugar and granulated sugar for 3 minutes.
2. Add the whole egg and one yolk to the mixture, and whip it for another 6 minutes. The batter will be light in color.
3. Sift together the flours, salt, baking soda and baking powder.
4. Using a PADDLE attachment, slowly add the dry ingredients until almost fulling incorporated. Then add the chocolate chips and mix until the batter is completely mixed together. The dough will be soft. 
5. Chill dough until you can scoop it. (I rested mine overnight). The original recipe says you can also put the dough on parchment paper, roll up, twist ends and chill for 1 hour and then slice the cookie pieces. 
6. After dough has chilled, preheat oven to 375 degrees. 
7. Scoop (or cut if you did the log method) a dozen cookies on a parchment lined baking sheet. You should get close to 3 dozen cookies. Bake for 12-15 minutes, until the edges are golden brown but the center is still soft. 
8. After baking, let sit on baking sheet for a couple minutes and then remove with a spatula to a cooling rack. Enjoy!
Pin It!

Brown Butter and Vanilla Bean Weekend Cake - Tuesdays with Dorie

Tuesday, January 27, 2015

Brown Butter and Vanilla Bean Weekend Cake
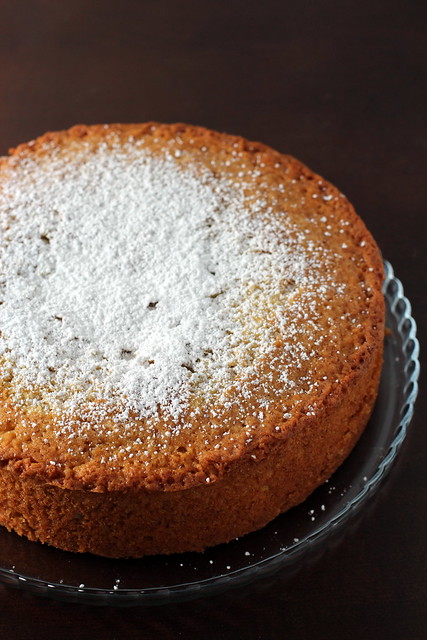
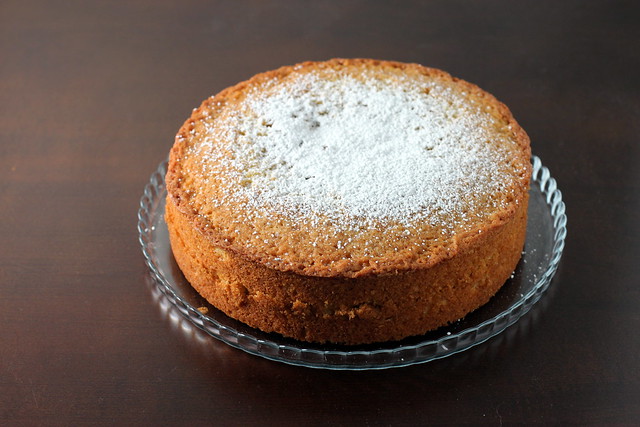
Brown-Butter-and-Vanilla-Bean Weekend Cake

It's time for Tuesdays with Dorie! I made this last month and work really enjoyed it. I'm pretty exhausted so this is going to be super short.

Brown Butter and Vanilla Bean Weekend CakeTuesdays with Dorie group does not post the recipes as we want to support the great work of Dorie Greenspan so please purchase the book, Baking Chez Moi: Recipes from My Paris Home to Your Home Anywhere and turn to page 6 for this fun recipe!

Brown butter is always nerve racking to make. Is it ready? Is it too far? What's that smell? Is that toasty or is that burnt?


This is supposed to be baked in a loaf pan, but I couldn't get to it. I tweeted a plea for help and professional baker and author @janeofmanytrade came to the rescue. She said I could use an 8" round. Thanks Alisa!

I didn't have a vanilla bean, so I used 2 teaspoons of both Nielsen-Massey vanilla extract and vanilla paste. Do you have the paste? I love it. More economical than getting vanilla beans and you get all the yummy flakes. I also skipped the alcohol (dark rum or amaretto).

I topped mine with some powdered sugar so it didn't look so plain.

I have a bunch of other stuff to post, and I hope to get to it next month (there are some good oatmeal scones coming up).

Brown Butter and Vanilla Bean Weekend Cake

Good luck to Dorie Greenspan and all my friends on the East Coast as you get through this snowstorm!

See you next time,
Mary the Food Librarian

Pin It!

Dahlia Bakery Banana Chocolate Chunk Walnut Loaf

Monday, January 19, 2015

Banana Chocolate Chunk Walnut Loaf - Dahlia Bakery
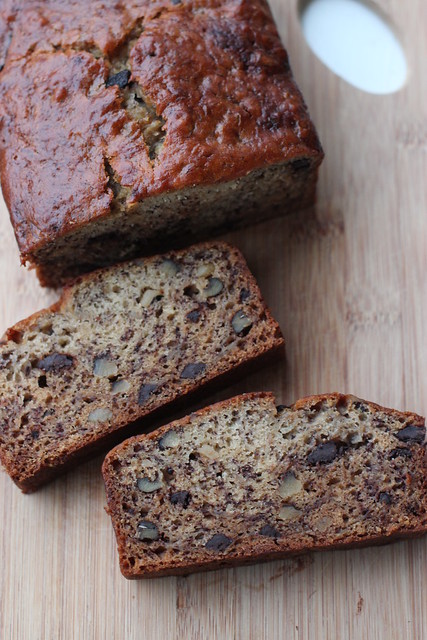
Dahlia Bakery Banana Chocolate Chunk Walnut Loaf

When you have those banana that have seen better days... make this recipe! It's from the Dahlia Bakery cookbook.

I really enjoyed visiting the Seattle bakery in 2013...it's a must see while in Seattle (along with the beautiful Seattle Library!)

Banana Chocolate Chunk Walnut Loaf - Dahlia Bakery
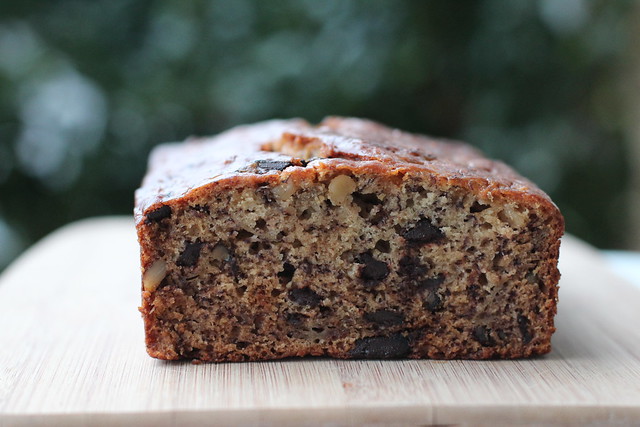
Bananas, chocolate chunks and walnuts...put some sour cream to make it rich and delicious. The loaf won't last long, but if it does, it tastes even better!

Banana Chocolate Chunk Walnut Loaf - Dahlia Bakery

Banana Chocolate Chunk Walnut Loaf
Adapted from: The Dahlia Bakery Cookbook: Sweetness in Seattle*
Find it in your library with WorldCat

1/2 c (2 3/4 ounces / 79 grams) bittersweet chocolate chunks (I used Trader Joe's Chocolate Chunks)
1/3 c (1 1/4 ounces / 35 grams) walnuts, toasted, cooled and roughly chopped (I used Trader Joe's Walnut Baking Bits and didn't toast them)
1 1/4 c (6 3/8 ounces / 180 grams) all-purpose flour
1 1/4 t baking soda
1/4 t kosher salt
About 1 pound of very ripe bananas (2-3) - 1 cup of banana puree
1/4 c canola oil
1/2 c (3 1/2 ounces / 100 grams) sugar
1 large egg
1/4 c (2 ounces / 58 grams) sour cream

Preheat oven to 350. Prep a loaf pan (they recommend 8 1/2 x 4 1/2 x 2 1/2 inches) with butter & flour, or spray with non-stick spray. I line my pan with parchment paper to make it easier to remove from the pan. I used a Parrish/Magic Line 9 x 5 loaf pan so mine didn't come out as tall as the one in the book.

Mix chocolate chunks and walnuts in a small bowl. Add 2 Tablespoons flour and toss to coat. Set aside.

Sift together the remaining flour, baking soda and salt into a medium bowl or some parchment paper.

The instructions say to beat the bananas into a smooth puree then measure out 1 cup. I just mashed mine with a fork and measured out 1 cup, and put it into the banana puree in the bowl of a stand mixer with paddle attachment.

On low speed, add the oil, sugar, egg and sour cream. Mix until everything is combined.

Add the dry ingredients and mix just until incorporated.  Fold in reserved chocolate-walnut mixture with a rubber spatula. Scrape the batter into the prepared pan.

Bake until skewer inserted into the loaf comes out with a few moist crumbs clinging but no batter, 65-70 minutes (if you use a different size pan, start checking early). The loaf will be dark golden brown and there will probably be a crack running through the top. Remove the pan from the oven and cool on a wire rack for 15 minutes. Unmold the banana bread, then cool on a wire rack to slightly warm or room temperature before slicing and serving.


 * I'm part of Amazon Affiliates and get a small % if you purchase from this link.
P.S. Turns out a made and blogged about this recipe in April 2013 and have no memory of it. Well, it's a good reminder that it's way yummy so you should make it! :)
Pin It!

Granola Energy Bars - Tuesdays with Dorie / Baking Chez Moi

Tuesday, January 13, 2015

Granola Energy Bars
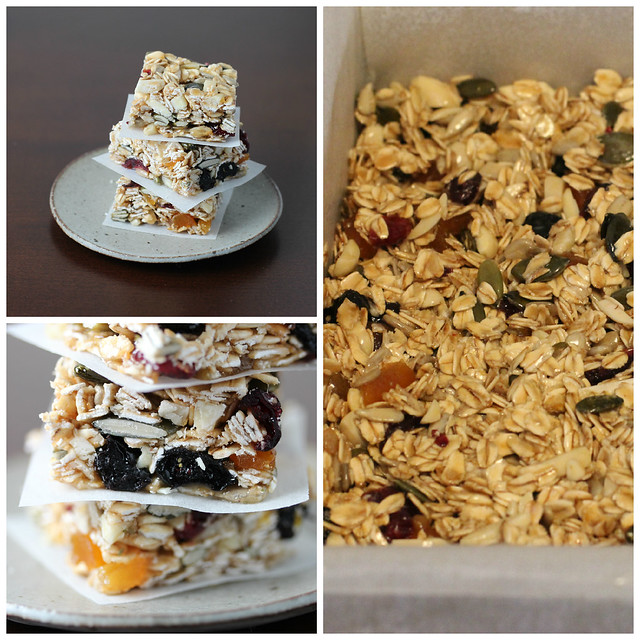
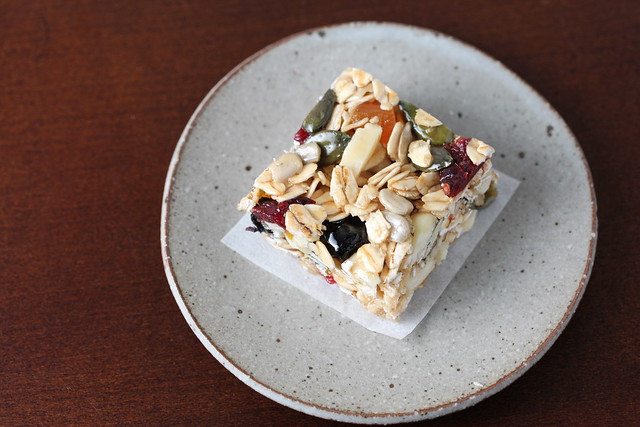
Granola Energy Bars

It's time for Tuesdays with Dorie! I missed December's recipes (two words: Mochi Day) but I hope to get back to them. It'll be fun to make a buche de noel in summertime! This week, it's Granola Energy Bars! These are super easy to make and I'm sure your kids would love helping you. Tuesdays with Dorie group does not post the recipes as we want to support the great work of Dorie Greenspan so please purchase the book, Baking Chez Moi: Recipes from My Paris Home to Your Home Anywhere and turn to page 328 for this fun recipe!

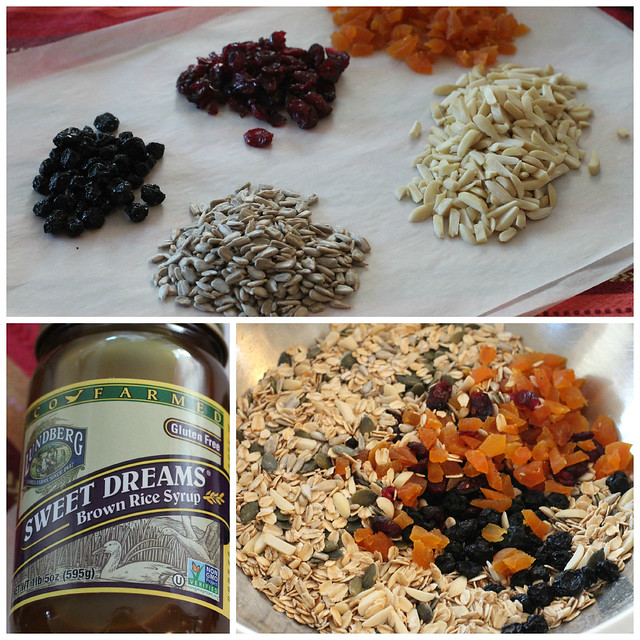
Granola Energy Bars These bars are very versatile and you can add your favorite dried fruits. I used dried blueberries, dried cranberries and dried apricots. I also skipped the coconut because it feels like dental floss (I like coconut flavored stuff but can't handle the strands).

  Granola Energy Bars Luckily, I live near a Sprouts Market with the bulk bins so I was able to buy small bits of the ingredients needed: slivered almonds, sunflower seeds, pumpkin seeds, and dried fruits. It also carried the brown rice syrup. This is an easy substitute for melted marshmallows in a rice krispie treat; I've been wanting to try it, and Dorie gave me a perfect reason to pick up a bottle. After measuring out your ingredients, it is a simple mix together and bake. Easy peasy and enjoy! Happy New Year everyone! And to those in TWD, I made the next recipe too (what?! I know, new year's resolution to have a tad less procrastination...) and it was delicious!

Granola Energy Bars See you soon, Mary the Food Librarian

P.S. If you didn't get this book for the holidays from Santa or your family, then buy it! You deserve to start the new year with awesome recipes. :)

Pin It!

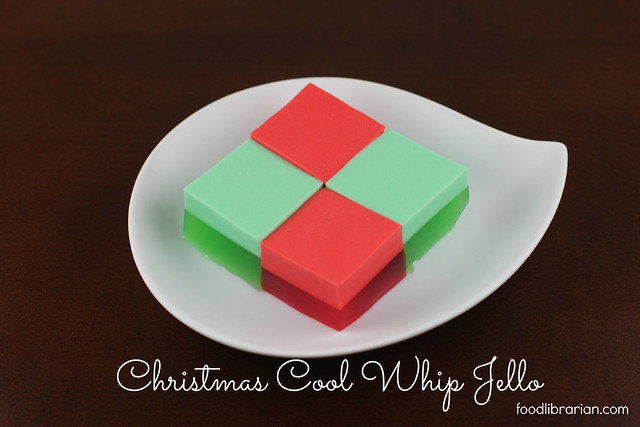
Christmas Cool Whip Jello / Gelatin

Monday, December 22, 2014

Christmas Cool Whip Jello

Hey, it's almost Christmas! How did that happen?

Anyway, I'm working until 6 pm on Christmas eve. If you are like me, you need a quick and easy dessert. And here it is!

Jello + Cool Whip + Refrig = Easy Peasy.

It's not "natural" (have you seen what's in Cool Whip?) but kids love it and there is something nostalgic about Jello.

Christmas Cool Whip Jello
I made this before as Orange Creamsicle Jello. This time, I made it with Lime and Cherry Jello.

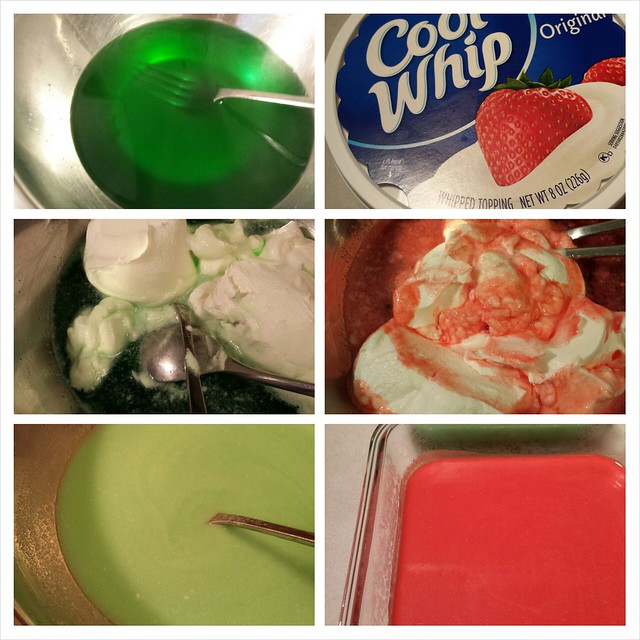
Just dissolve a pack of Jello (using less water than the package says to use so it will be stiffer) and add Cool Whip. Blend to melt and pour into containers. Fridge overnight. Done!

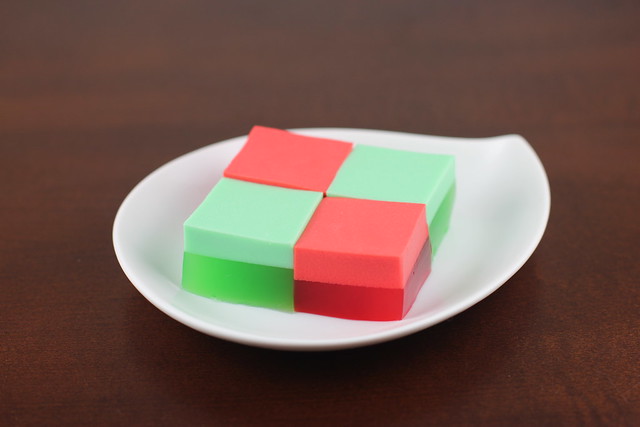
Christmas Cool Whip Jello
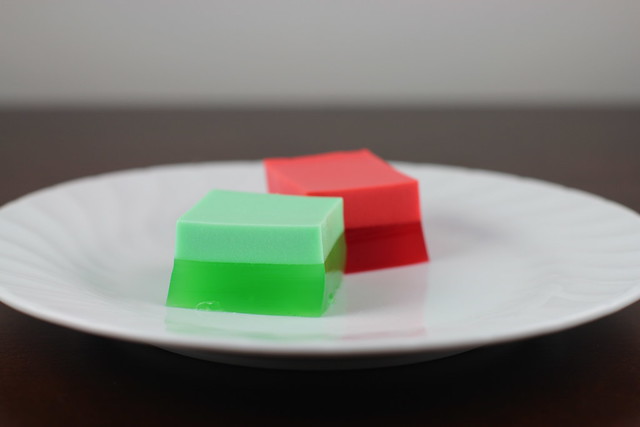
The Cool Whip layer rises to the top while it chills.

Another Christmas Jello recipe you might like is Christmas Broken Glass Jello! You need a little more time for this one, but it is super easy too!!

Christmas Cool Whip Jello
Christmas Cool Whip Jello / Gelatin 

You need to make two batches - one green and one red.

RED or GREEN:
1 cup boiling water
1 small box Green or Red Jello (3 ounces)
1/4 cup cold water
1 cup Cool Whip, thawed

1. Place contents of orange Jello packet in a large bowl. Add boiling water. Stir until completely dissolved.
2. Add 1/4 cup cold water.
3. Stir in 1 cup of Cool Whip. It will melt and dissolve. The mixture will be opaque. It will separate to a two layer Jello as it chills.
4. Pour into pan (I used 4-cup pyrex containers).
5. Chill until firm (preferably overnight) and cut into squares.
Pin It!

The Food Librarian's Kitchen Essentials

Wednesday, December 17, 2014

Kitchen Essentials

Kitchen Essentials (According to the Food Librarian)

I went to Crate & Barrel this weekend for some holiday shopping. The only way I can handle Xmas shopping is at night and with an audiobook playing in my head. Tonight, it was related to the Serial podcast. Have you been listening? So good. (You can find Episodes 1-11 here...and then just binge listen while shopping, driving or baking). Anyway, I heard Episode 11 and I'm just waiting for the last Episode to come out on Thursday. So what's a person to do while they wait? Listen to a podcast of people who are also waiting for the next Serial podcast. I listened to Serially Obsessed for Episode 11. Yes, I'm obsessed too.

Updated to add: Episode 12 was really good...but I want more!

Anywho, sorry that was a long intro/tangent...when I was in Crate & Barrel I came across the most ridiculous gadgets: The Mini Scone pan ($34) and the Butter Slicer ($9). I immediately posted a photo online with the caption:
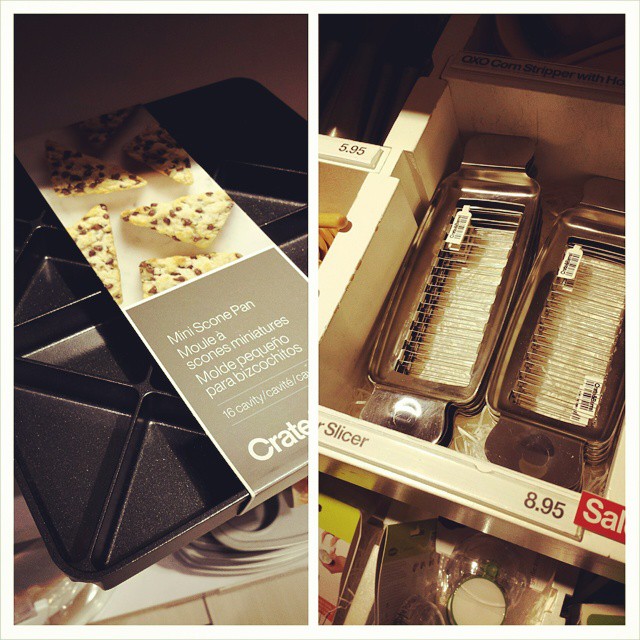
Scone pan $34 and Butter slicer $9. You already own these tools. It's called a knife #ridiculousgadgets #baking #cheapbenchscrapperworkstoo

The Mini Scone Pan and Butter Slicer.
You already have these tools.
It's called a knife.

And it definitely hit a nerve...thank goodness I'm not the only one who thinks these are clutter-making gadgets. Diane and I "talked" (you know, commenting on Instragram photos or via twitter is totally talking), and she mentioned using a bench scraper for these tasks too. I agreed that the bench scraper would totally work and is an kitchen essential. That got me thinking...what else do you need in your kitchen? Here goes:

Essential Practice Must-Have Kitchen Equipment List
AKA The Top 15 Items I would Unpack First If I Ever Moved

1. KitchenAid Stand Mixer
Can't live without this and most cookbooks expect you to have one. It doesn't need to be a fancy one...I've used the basic model for 20+ years.

2. Half Sheet Pans with Lid
Forget cookie sheets, these half sheet pans are so versatile. You can make thin sheet cakes like Texas Sheet Cake, cookies, roast chicken breasts, roast vegetables, and use them as a tray to carry stuff at dinner. Getting a few lids is helpful too! You can stack them in the fridge and they aren't as tall as a traditional 9 x 13 pan. I have about 10 of these in the kitchen so I made multiple trays of cookies without having to cool off and wash them between batches.

3. Parchment Paper Pan Liner for the half sheet pan (pre-cut)
These are so great. I buy them at a restaurant supply place in boxes of 1,000 sheets. You can use them on the half-sheet tray for cookies, fold to line a 9 x 9 square pan so it makes a sling (for easy removal of your brownies), sift ingredients onto the parchment and then pour it into the KitchenAid mixer slowly, and So Much More. I'm not a fan of the Silpat because you have to wash it, and the parchments are disposable and easy to use.

4. Bench Scraper (this one by Oxo has a comfortable handle) but this cheaper wood handle bench scraper works too.
You can cut scones into triangle with this!
You can cut butter with this!
See, I just saved you $43 at Crate & Barrel!

5. Rubber Scraper or Spatula
I get mine at Smart and Final or a restaurant supply place. You might want to mark a set "Baking Only" with painter's tape or a Sharpie. Because they are rubber and/or silicone, they really keep the smells of garlic, at least in my experience.

6. Ice Cream Disher or Ice Cream Scoop of various sizes and the Cookie Scoop
Must haves in the kitchen for dishing out the same size baked goods: cupcakes, drop scones and biscuits, cookies, etc.

7. Kitchen Scale
Make sure it is digital (more accurate reading) and that it can easily switch from grams to ounces (I prefer grams because it is easier to half or double a recipe, but many times you'll need ounces too). It's always faster to weigh the ingredients and it's more accurate!

8. Bundt Pan (dude, of course)
You really only need the basic one (12 cup Nordic Ware Bundt Pan) but you might want to get a fancy one and a 6-cup Bundt too. Read this post I wrote about my collection of Bundts.

9. 8" and 9" cake rounds and 8" and 9" square cake pans
Need rounds for birthday cakes and squares for brownies and snack cakes!

10. 9" x 13" Cake Pan
I like Magic Line's cake pans and their straight edges. They bake evenly too. Read my post about Magic Line.

11. Wire Rack (Half Sheet Size)
These are great because they fit inside a half-sheet pan. They can cool cookies, but you can also lay bacon or kale on it and pop it in the oven.

12. Big Old Sarah Wrap
If you are in the kitchen for any amount of time, I think you need to ditch the hand rolls of plastic wrap in favor of the industrial box. I've used one of these for years and can't image trying to wrap a half sheet tray with a little box. This lasts a long time (my friend is on 5 years, but I usually go through one in about 18 months). I get this one at Costco.

13. Good Vanilla (Nielsen-Massey)
Good vanilla goes a long way to making cakes taste good. I buy this mega bottle.

14. Big Pastry Tips and Disposable Pastry Bags
I like the big pastry tips to quickly frost cupcakes, but a basic set in a box is good too.
This is 100 bags is only $9. You can also get larger 18" bags.

15. Offset Spatula
I own at least 6 of these. Big ones and little ones. They frost. They ease muffins out of the cupcake tray. They get cookies off parchment. They smooth out batter in a pan. They rock.

Bonus: Good Cookbooks
My favorites are by Dorie Greenspan! Buy her latest one - Baking Chez Moi :)

Here are the photos from Amazon of the items I mentioned above. Happy shopping and avoiding the scone tray... :) - mary


P.S. You can get these products at most kitchen supply stores. I used Amazon because they have pictures. Also need to disclose that I'm part of Amazon's Affiliate program so if you buy anything these links, then I get a few cents (doesn't cost you anything and I'll never know who buys what).


Pin It!